 Linuxbeast Developer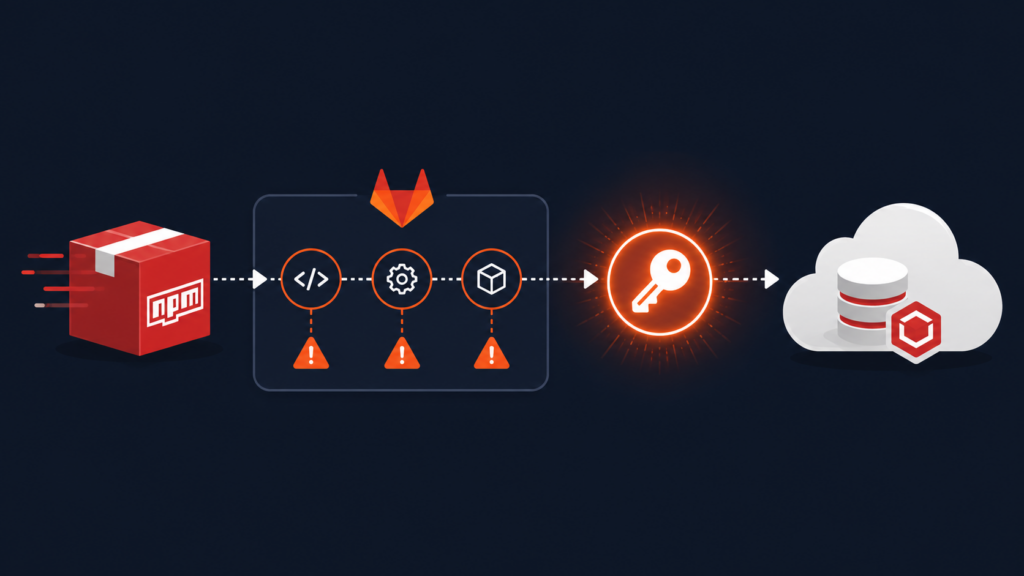
npm is phasing out long-lived tokens that skip two-factor auth, so the modern way to publish a package from a pipeline is npm Trusted Publishing with OIDC. This guide shows the working GitLab CI setup, then walks through the six traps that make it fail with a cryptic error even when the config looks correct. Every one of these cost real debugging time, so hopefully this saves you a few hours.
Quick plain-language version first: OIDC lets your pipeline prove who it is with a short-lived, single-use token instead of a password you store somewhere. Think of it like a visitor badge that only works for one meeting, versus a master key you carry around and hope nobody copies. If you have used this pattern for cloud logins before (for example, How to Deploy AWS Lambda with SAM and GitLab CI/CD Using OIDC), the idea is the same, but npm checks a few extra things that AWS does not.
Prerequisites
- A GitLab.com project with CI/CD enabled (the free hosted runners are fine)
- An npm account that is a member of your org/scope with publish rights
- npm CLI 11.5.1 or newer and Node 22.14 or newer (OIDC support). Need to switch Node versions? See How to Switch Node.js Version in WSL Ubuntu
- A scoped package name, like
@myorg/my-cli-tool
The local commands in this guide are run on WSL2 Ubuntu on Windows, but they work the same on any Ubuntu system.
How npm Trusted Publishing works on GitLab CI
Instead of saving an npm token in a CI/CD variable, GitLab creates a short-lived OIDC token during the job. npm trades that token for publish rights based on a trusted publisher you register on the package page. You also get build provenance for free. The catch: npm only trusts the token if the job matches the exact publisher you registered, and “exact” includes a couple of things that are easy to miss.
Step 1: Register the trusted publisher on npmjs
On npmjs.com, open your package and go to Settings, then Trusted Publishing, then GitLab CI/CD. Fill in the values that match your repo exactly (they are case-sensitive):
| Field | Value (example) |
|---|---|
| Namespace | mygroup/myteam |
| Project name | my-cli-tool |
| Top-level CI file path | .gitlab-ci.yml |
| Environment name (optional) | prod |
| Allowed actions | npm publish |
Namespace is the full group path including any subgroups, and Project name is just the project slug. Copy both straight from your repo URL so you do not guess wrong.
Step 2: Configure the publish job
In your pipeline, request the OIDC token and do not set any npm auth token. The
aud value below must be exactly npm:registry.npmjs.org.
publish-npm:
  stage: deploy
  tags:
    - saas-linux-small-amd64          # a GitLab.com-hosted runner (see trap 5)
  id_tokens:
    NPM_ID_TOKEN:
      aud: "npm:registry.npmjs.org"   # exact audience npm expects
    SIGSTORE_ID_TOKEN:
      aud: sigstore                   # optional: enables build provenance
  before_script:
    - npm i -g npm@latest             # npm 11.5.1 or newer is required
    - npm ci
  script:
    - printf '@myorg:registry=https://registry.npmjs.org/\n' > .npmrc
- npm publish --access publicid_tokens: tells GitLab to mint the OIDC token and expose it asNPM_ID_TOKEN- The
.npmrchas only a scope-to-registry line, no_authToken. OIDC provides the credential --access public: scoped packages are private by default, so this makes it public
This is the public npmjs flow. If instead you want a private package on your own GitLab registry, that is a different setup, covered in How to Publish a Public NPM Package via GitLab Package Registry.
Step 3: Get package.json right
Two small fields cause big headaches. The name must be scoped, and the
bin path must not start with ./.
{
  "name": "@myorg/my-cli-tool",
  "bin": {
    "my-cli-tool": "dist/index.js"
  }
}
An unscoped name matches no trusted publisher. And npm silently strips a
bin entry whose value starts with ./, which quietly leaves
your package unable to run through npx. Use dist/index.js,
not ./dist/index.js.
Step 4: First publish for a brand-new package
Here is a chicken-and-egg problem: you cannot register a trusted publisher until the package already exists on npm. So for a brand-new package, publish it once by hand from your machine, then set up the trusted publisher, then let CI take over for every release after that.
npm run build
npm login
npm publish --access public
The six traps that cause a cryptic publish error
When trusted publishing does not match, npm often reports a misleading
ENEEDAUTH (“you need to log in”) or a 404, not a helpful message about
the trust config. So when the error says login and you know OIDC should be working,
walk this list. Understanding what each error really means saves a lot of guessing,
the same way
Understanding HTTP Status Codes and Who Should Fix Them
helps with web errors.
| Symptom | Cause | Fix |
|---|---|---|
| EOTP, one-time password required | Your publish token is still subject to 2FA | Move to Trusted Publishing (OIDC), no stored token |
| ENEEDAUTH, the log shows an unscoped name | package.json name is not scoped | Scope it, like @myorg/my-cli-tool |
| Package not runnable via npx | bin path starts with ./ | Use dist/index.js with no leading ./ |
| ENEEDAUTH, token points at another repo | Your CI config file lives in a different repo (external config) | Keep the top-level .gitlab-ci.yml in this repo (see trap 4 below) |
| ENEEDAUTH on a private runner | Self-hosted runner, which npm rejects | Run the publish job on a GitLab.com-hosted runner |
| ENEEDAUTH with everything else correct | A leftover npm token, even an empty one, blocks the OIDC fallback | Make sure no npm token or .npmrc auth is present in the job |
Trap 4 in detail: keep the CI config in your repo
This one is the sneakiest. npm checks a token field called ci_config_ref_uri,
which points at your top-level pipeline file. If your project uses an
external CI config (the “CI/CD configuration file” setting pointing at a shared template
repo), that field names the template repo, not yours, so it never matches the
trusted publisher.
- In GitLab, go to project Settings, CI/CD, then CI/CD configuration file and leave it blank (the default
.gitlab-ci.yml) - Your in-repo
.gitlab-ci.ymlcan stillincludea shared template. Includes do not change the token field
The trick is a thin wrapper file that stays in your repo, re-declares its inputs, and forwards them to the shared template. That keeps npm’s OIDC claim pointed at your own repository while still letting the real publishing logic live in a reusable CI file.
spec:
  inputs:
    publish:
      type: boolean
      default: false
---
include:
  - project: mygroup/ci-templates
    ref: main
    file: /templates/npm-publish.yml
    inputs:
      publish: $[[ inputs.publish ]]
A quick diagnostic when it still fails
Because the error is misleading, the fastest way to find the real problem is to print
the token claims. Add this to your job before npm publish, run it once,
then remove it.
echo "$NPM_ID_TOKEN" | cut -d. -f2 | tr '_-' '/+' | base64 -d 2>/dev/null
echo "npm version: $(npm -v)"
echo "authToken: [$(npm config get //registry.npmjs.org/:_authToken)]"
In the decoded output, check three things: runner_environment should be
gitlab-hosted (trap 5), ci_config_ref_uri should end with your
repo path and .gitlab-ci.yml (trap 4), and the authToken line
should be empty (trap 6). If all three look right, the publish will go through.
Conclusion
Once it clicks, npm Trusted Publishing on GitLab CI is cleaner than juggling tokens: no secrets to rotate, and provenance out of the box. The setup itself is short. The time sink is the six traps, especially the external CI config and the self-hosted runner, so keep the diagnostic handy.
From here, you can extract the wrapper pattern into a shared GitLab CI include for other packages, or apply the same OIDC idea to your cloud deploys with SAM and GitLab CI/CD using OIDC.