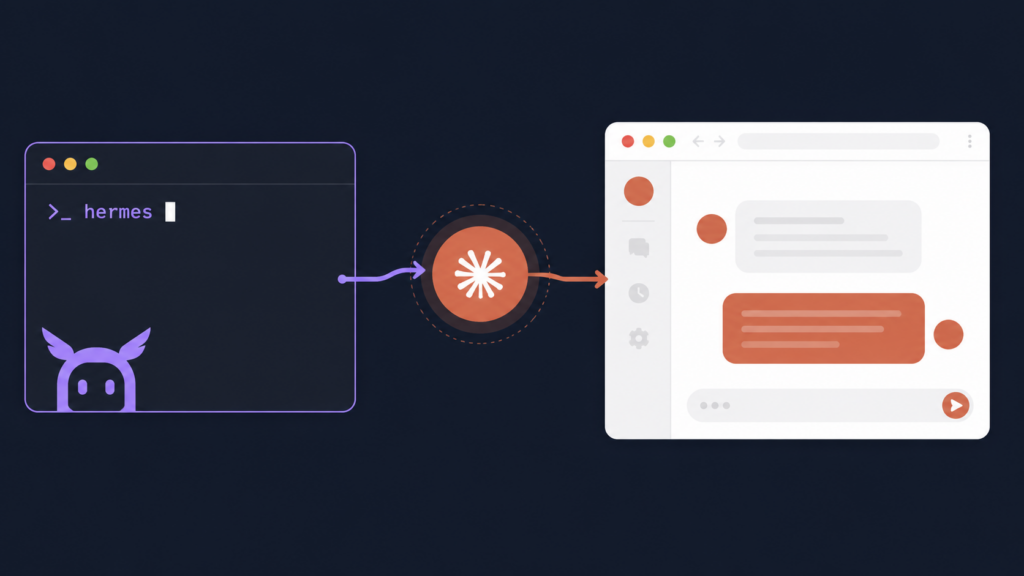
Hermes Agent is an open-source AI agent from Nous Research. Think of it less as a chatbot and more as an assistant that lives on your machine. It can read your files, run terminal commands, browse the web, and remember what it learns between sessions. And unlike most AI tools, you’re not locked into one company’s model: you can point it at Claude, GPT, or a handful of others and switch whenever you like.
In this guide we’ll install Hermes on WSL2 Ubuntu, switch its default model from OpenAI Codex over to Anthropic’s Claude, and then open up the browser-based Web UI so you can chat with it from any window, no terminal required once it’s running. The steps below were tested on Hermes Agent v0.14.0 (release 2026.5.16) running Python 3.11 inside WSL2 Ubuntu 22.04. The same commands work on plain Ubuntu or macOS, but WSL2 is the focus here since that’s what most Windows users will be on.
Before You Start
You don’t need much. The installer does most of the heavy lifting, so the short list is:
- WSL2 Ubuntu (22.04 or newer). New to this? Start with
How to Install Ubuntu 22.04 in WSL2 on Windows.
WSL2 matters for one feature in particular: the in-browser chat needs it on Windows.
- Git. That’s the only thing the one-line installer needs. It pulls in Python, Node, and everything else by itself. Check with
git --version.
- An AI provider account. For this guide that’s an Anthropic
(Claude) account, but Hermes also works with Nous Portal, OpenAI, and
others.
Step 1: Install Hermes Agent
Hermes is published on PyPI as hermes-agent. Open your Ubuntu
terminal and install it into your user environment:
pip install --user hermes-agentpip install: fetches and installs the package from PyPI.--user: installs into~/.local/so you don’t needsudo.
Then run the postinstall step. This pulls in the non-Python bits Hermes needs at runtime: Node modules for the Web UI, a headless browser for web automation, ripgrep for fast file search, and ffmpeg for media tools:
hermes postinstallConfirm the install with two quick commands:
hermes version
hermes doctor
Expected output for hermes version looks like this:
Hermes Agent v0.14.0 (2026.5.16)
Project: /home/you/.hermes/hermes-agent
Python: 3.11.15
OpenAI SDK: 2.24.0
Up to date
hermes version: prints the installed version, project path, embedded Python, and whether you’re on the latest release.hermes doctor: runs a config and dependency check. Anything missing (Node, browser, provider auth) will be flagged here.
If hermes version shows an older release, upgrade with
pip install --user --upgrade hermes-agent and re-run
hermes postinstall.
If you ever see hermes: command not found, your shell just
can’t see where it was installed yet. This one-time fix sorts it:
echo 'export PATH="$HOME/.local/bin:$PATH"' >> ~/.bashrc
source ~/.bashrc
Step 2: Run the Setup Wizard
Hermes ships with a friendly setup wizard that walks you through the basics: which AI provider to use, which model, and which tools to turn on. Run it once:
hermes setupJust answer the prompts. Don’t overthink it. Every choice here can be changed later, and we’re about to change the most important one in the next step anyway.
Step 3: Switch from Codex to Claude
Fresh installs often default to OpenAI Codex, especially if you signed in with a ChatGPT account during setup. If you’d rather use Anthropic’s Claude (great for coding, writing, and careful reasoning), switching takes about a minute.
First, get a Claude API key from console.anthropic.com and make it available to Hermes:
echo 'export ANTHROPIC_API_KEY="YOUR_API_KEY"' >> ~/.bashrc
source ~/.bashrc
(On a Claude Max plan instead? Hermes can log you in directly. Just pick the OAuth option when it offers.)
Now open the model picker and choose your new default:
hermes modelPick Anthropic, then choose a Claude model from the list. As a rough guide: Opus is the smartest (and priciest), Sonnet is the everyday all-rounder, and Haiku is the fastest and cheapest for quick jobs. Go with whatever the picker shows. Version numbers change often, so it’s best to trust the live list rather than memorize a name.
That’s it. Claude is now your default. Want to flip back to Codex someday?
Run hermes model again and pick OpenAI. Your logins for each
provider stay saved, so switching back and forth is instant.
Before moving on, give it a quick test drive from the terminal. Just type:
hermes
Ask it something simple like “list the files in this folder and tell me
what kind of project it is.” If it answers sensibly, you’re past the
hard part. Press Ctrl+D to exit.
Step 4: Launch the Web UI
The terminal is great, but Hermes also has a clean browser dashboard, and with one extra flag, that dashboard includes a full chat tab. Start it like this:
hermes --tui dashboard
Notice the flag position: --tui goes before the
dashboard subcommand, not after. It’s a global option, so
putting it at the end (hermes dashboard --tui) gives you an
unrecognized arguments: --tui error. Easy to miss, easy to fix.
The first launch takes a little longer because it builds the web page once;
after that it’s quick. When it’s ready, it opens your browser at
http://127.0.0.1:9119. Because WSL2 shares localhost with
Windows automatically, you can also just open that address in Edge or Chrome
on the Windows side, no extra setup needed.
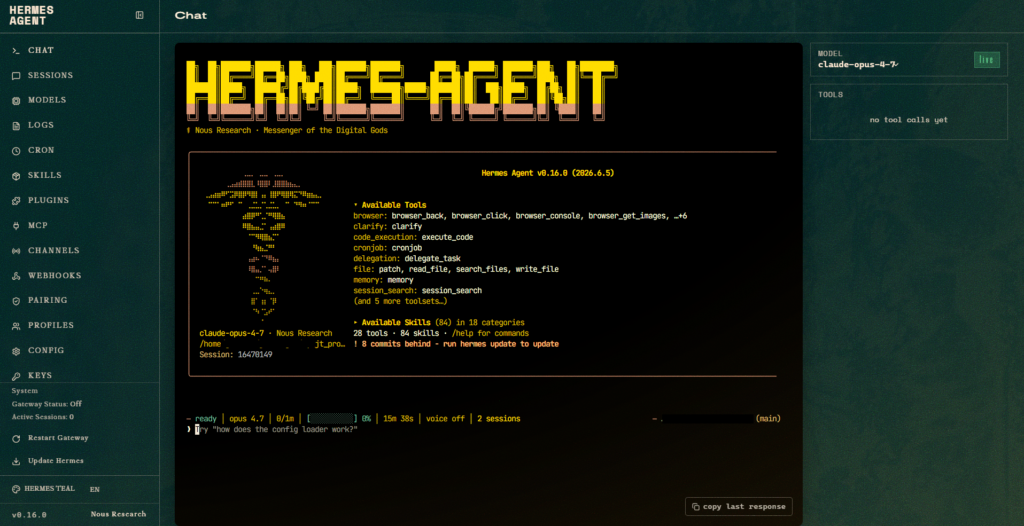
http://127.0.0.1:9119 with the Chat tab enabled.A couple of things worth knowing:
- The
--tuiflag is what switches on the in-browser Chat tab. Without it, you get the dashboard but no chat. And remember, it has to come beforedashboardon the command line. - That chat tab is the reason this guide is WSL2-specific. It doesn’t run on plain Windows, only inside WSL2 (or Linux/macOS).
- The dashboard only listens on your own machine by default. It holds your API keys, so leave it that way unless you really know you need network access.
- Port
9119already taken? Add--port 9120(or any free number) afterdashboard, likehermes --tui dashboard --port 9120.
Step 5: Find Your Way Around the Dashboard
Once the page loads, you’ll see a sidebar of tabs. You won’t need all of them on day one, but here’s the lay of the land:
- Chat: the main event. Talk to the agent right here in the browser; it’s the same Claude, same tools, same everything you’d get in the terminal.
- Sessions: your conversation history. Search old chats and pick any one back up where you left off.
- Models: switch your provider or model here, the same way
hermes modeldoes in the terminal. - Config: change settings through simple forms instead of editing files.
- Keys: add or update your API keys without touching the command line.
- Skills: browse and toggle the reusable “playbooks” the agent can use.
- Cron: schedule the agent to run on its own (a morning summary, a nightly check, that sort of thing).
- Logs: peek at what the agent has been doing behind the scenes.
You’ll spot a few more in the sidebar like Plugins, Profiles, and Documentation: but those are for later. Ignore them for now.
For your first session, just open the Chat tab and start typing. Everything else is there when you want it.
Stopping and Restarting
When you’re done, press Ctrl+C in the terminal where the
dashboard is running. If you started it in the background and the terminal’s
gone, Hermes has a built-in stop command that’s safer than reaching for
pkill:
hermes dashboard --stop
You can also check whether it’s still running with
hermes dashboard --status.
To start it up again, just run hermes --tui dashboard: it’s
much faster the second time around since the web build is already cached.
If Something Goes Wrong
Most hiccups are quick fixes:
- The dashboard won’t start: you probably skipped the extras in Step 1. Run
pip install 'hermes-agent[web,pty]'and try again. - The Chat tab says “use WSL2”: you’re running on native Windows. Run Hermes inside your WSL2 Ubuntu terminal instead.
- Login or model errors: run
hermes doctor; it tells you exactly what’s missing and how to fix it. - Want the latest version?: run
hermes updateany time.
When in doubt, hermes doctor is your friend. It’s the single command that diagnoses just about everything.
Wrapping Up
And that’s the whole setup: Hermes installed on WSL2, running on Claude
instead of Codex, with a browser chat you can pull up any time at
http://127.0.0.1:9119. From here, the best way to learn it is
to use it. Ask it to explain a project, draft something, or run a small
task and watch how it works.
If you’re building out a coding setup, a natural next step is pairing Hermes with Claude Code CLI on WSL2 Ubuntu. And in a follow-up post I’ll cover connecting Hermes to messaging apps like Telegram and Slack, so the same agent can reach you outside the terminal entirely.