Are you encountering an ‘Operation not permitted’ error when trying to run commands in the Visual Studio Code (VSCode) terminal on your macOS computer? This can be frustrating, especially if the commands work fine in other terminals like iTerm or the default macOS terminal.
Here’s a common scenario that Mac users might face:
ls ~/Downloads
And the terminal throws back:
ls: .: Operation not permitted
Don’t worry! This guide will walk you through the steps to grant the necessary permissions to VSCode so you can carry on with your work smoothly.
Step-by-Step Guide to Granting Full Disk Access to VSCode
Step 1: Open System Preferences
Navigate to the Apple menu and select System Preferences.
Step 2: Access Security & Privacy Settings
Within System Preferences, open Security & Privacy.
Step 3: Focus on Privacy
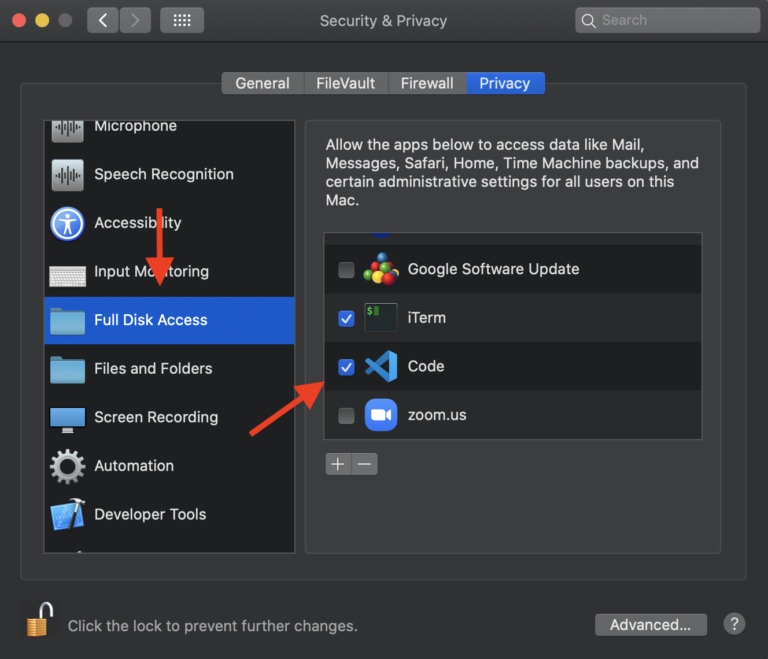
Click on the Privacy tab. On the left-side menu, scroll down and select Full Disk Access.
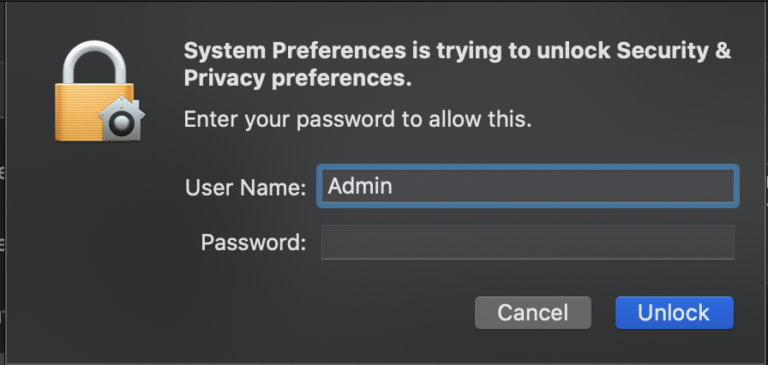
Step 4: Authenticate as Admin
Look for the lock icon (?) at the bottom left corner of the window. Click on it and enter your admin credentials to unlock the settings.

Step 5: Allow VSCode Full Disk Access
With the lock now open, locate and tick the checkbox next to Visual Studio Code. This grants the application full disk access on your Mac.

Final Step: Relaunch VSCode
After modifying the privacy settings, close the Security & Privacy window and restart VSCode.
Now, try running the ls command again in the VSCode terminal:
ls ~/Downloads
You should see the contents of your Downloads directory listed without errors:
file1.txt file2.txt file3.txt file4.txt file5.txt
Conclusion
That’s the entire process! By following these instructions, you should no longer encounter the ‘Operation not permitted’ error within VSCode on your macOS computer. We hope this tutorial was helpful in troubleshooting your issues with terminal access permissions.

