Welcome to our detailed tutorial on setting up Apache 2.4 Web Server on an EC2 instance running Ubuntu 22.04 LTS. Whether you’re a developer, system administrator, or just dabbling in web hosting, this blog post will provide you with a step-by-step guide to get your Apache server operational. Follow these steps to install and configure Apache 2.4 on an Ubuntu 22.04 EC2 instance.
Prerequisites
- An AWS account.
- An EC2 Ubuntu 22.04 instance launched and accessible. EC2 instance setup guide.
- Security Group settings that allow HTTP (port 80) and HTTPS (port 443) from inbound traffic.
- SSH access to the instance with appropriate credentials.
Step 1: Connect to Your EC2 Instance
To start, SSH into your Ubuntu instance:
ssh -i /path/to/your-key.pem ubuntu@your-instance-public-dns-name
Replace /path/to/your-key.pem with the path to your private key file and your-instance-public-dns-name with the public DNS name or IP of your EC2 instance.
Step 2: Update Package Lists
Ensure all your Ubuntu system packages are up-to-date:
sudo apt update
Step 3: Add the PPA Repository
Before installing Apache2, add Ondřej Surý’s Apache2 PPA to get the latest version:
sudo add-apt-repository ppa:ondrej/apache2 -y
The ppa:ondrej/apache2 PPA provides the latest stable version of Apache2 and is maintained by Ondřej Surý, who is known for maintaining up-to-date versions of various software packages.
Step 4: Install Apache2
Update again and install the Apache2 package from the newly added PPA:
sudo apt update
sudo apt install apache2 -y
Step 5: Verify Installation
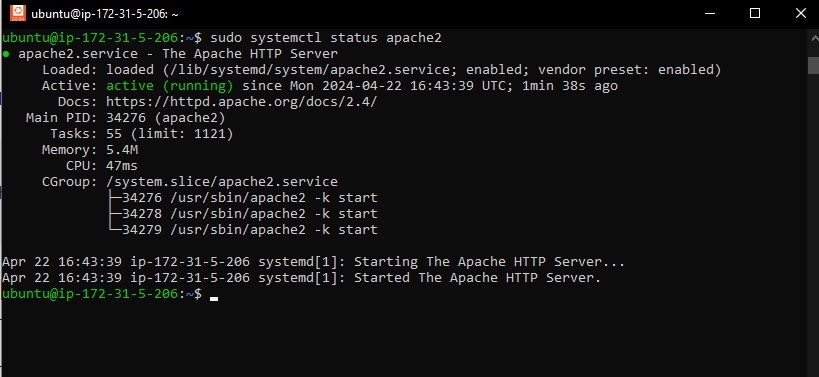
Confirm that Apache2 is installed and running:
sudo systemctl status apache2
If Apache is running properly, you will see a status indicating active (running).

Verify Apache2 version:
sudo apache2ctl -v
Expected output:
Server version: Apache/2.4.59 (Ubuntu)
Server built:   2024-04-09T11:52:19
Step 6: Adjust Firewall
First, enable the firewall:
sudo ufw enable
⚠️ Enable the firewall with caution, as it may disrupt existing network connections, including SSH sessions.
Ensure to allow web traffic on the following standard ports:
sudo ufw allow 80/tcp # Allow HTTP traffic
sudo ufw allow 443/tcp # Allow HTTPS traffic
sudo ufw allow 22/tcp # Allow SSH traffic
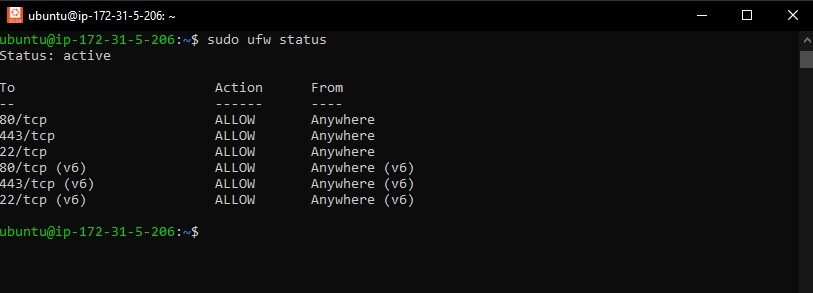
Check that SSH (22), HTTP (80) and HTTPS (443) are allowed in the output:
sudo ufw status
Expected output:

Then reload the firewall after making changes:
sudo ufw reload
Additional Tips:
- Regularly review firewall rules for alignment with security policies.
- Consider restricting access to specific IP addresses or ranges for enhanced security.
- Document custom rules for future reference and troubleshooting.
- Verify connectivity post-rule implementation to confirm accessibility of desired services.
Step 7: Check Apache2 Access
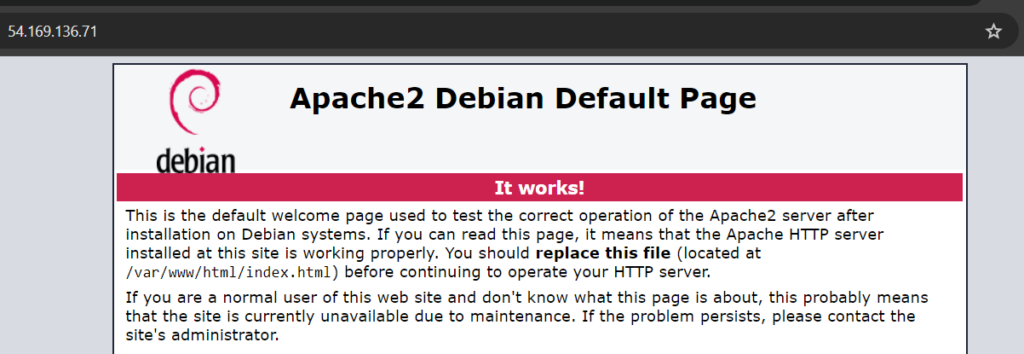
Open a web browser and type your EC2 instance’s public IP address or public DNS name:
http://your-instance-public-dns-name
You should see the default Apache2 Ubuntu default page:

Step 8: Manage Apache2 Process
Here’s how to stop, start, and enable the Apache2 service:
To stop Apache2:
sudo systemctl stop apache2
To start Apache2:
sudo systemctl start apache2
To enable Apache2 to start on boot:
sudo systemctl enable apache2
To restart Apache2:
sudo systemctl restart apache2
Final Step: Configure Virtual Hosts (Optional)
For serving multiple sites, use virtual hosts by creating config files in /etc/apache2/sites-available/.
Here’s a basic example for example.com:
Create a new configuration file:
sudo nano /etc/apache2/sites-available/example.com.conf
Paste the following content adjusting for your domain:
<VirtualHost *:80>
    ServerAdmin webmaster@example.com
    ServerName example.com
    ServerAlias www.example.com
    DocumentRoot /var/www/html/example.com/public_html
    ErrorLog ${APACHE_LOG_DIR}/error.log
    CustomLog ${APACHE_LOG_DIR}/access.log combined
</VirtualHost>
Enable the new site and disable the default site:
sudo a2ensite example.com.conf
sudo a2dissite 000-default.conf
Reload Apache2 for changes to take effect:
sudo systemctl reload apache2
Conclusion
You now have Apache2 installed and running on your Ubuntu 22.04 EC2 instance. For additional configurations such as SSL/TLS encryption or module installations, visit the Linuxbeast official guide for obtaining an SSL certificate for an Apache2 Web Server.

