Are you looking to access your ECS Fargate container and execute commands inside it for troubleshooting purposes? Amazon ECS Exec provides a straightforward way to securely interact with your containers to debug issues, troubleshoot errors, or collect one-off diagnostic information.
Prerequisites
Before we get started, ensure that you have installed the Session Manager plugin for AWS CLI. You can follow this guide to install AWS CLI v2 on WSL 2 with Ubuntu 22.04:
- Install AWS CLI v2 on your machine, link to documentation guide
- Install the Session Manager Plugin, see the following guide below:
First, download the Session Manager plugin .deb package:
curl "https://s3.amazonaws.com/session-manager-downloads/plugin/latest/ubuntu_64bit/session-manager-plugin.deb" -o "session-manager-plugin.deb"
Then, run the install command:
sudo dpkg -i session-manager-plugin.deb
Verify the installation by running:
session-manager-plugin
If successful, you should see the message:
The Session Manager plugin is installed successfully. Use the AWS CLI to start a session.
Check the version of the Session Manager plugin:
session-manager-plugin --version
Step 1. Create A Task Role For Task Definition
To enable ECS Exec, you need a task role for the task definition, which is distinct from the task execution role. Perform the following in the IAM service:
Navigate to AWS IAM -> Roles -> Create role and Choose Custom Trust policy.
Copy and paste the trust relationship policy below:
{
  "Version": "2012-10-17",
  "Statement": [
      {
          "Effect": "Allow",
          "Principal": {
              "Service": "ecs-tasks.amazonaws.com"
          },
          "Action": "sts:AssumeRole"
      }
  ]
}
Click Next, then Add permissions, and choose Create policy.
In the JSON editor, copy and paste the permissions policy below:
{
    "Version": "2012-10-17",
    "Statement": [
        {
            "Sid": "VisualEditor0",
            "Effect": "Allow",
            "Action": [
                "ssmmessages:CreateDataChannel",
                "ssmmessages:OpenDataChannel",
                "ssmmessages:OpenControlChannel",
                "ssmmessages:CreateControlChannel"
            ],
            "Resource": "*"
        }
    ]
}
Name the policy.
Go back to add permissions, search for the new policy, select it, click Next, and continue to create the role.
Step 2. Add ECS ExecuteCommand Permission to IAM Role for ECS Task Execution Role
Create another permission policy that allows ECS ExecuteCommand and attach it to your IAM role for ECS task execution role:
{
    "Version": "2012-10-17",
    "Statement": [
        {
            "Sid": "User access to ECS ExecuteCommand",
            "Effect": "Allow",
            "Action": "ecs:ExecuteCommand",
            "Resource": "*"
        }
    ]
}
Step 3. Update the ECS Task Definition Task Role
Go to the ECS console, click on Task definitions on the left panel, select your task definition, and create a new revision.
Scroll to the Task role section, select your new role for the task role, and click the Create button.

Step 4. Update the ECS Service
In the ECS Services tab:
- Click Update on your service.
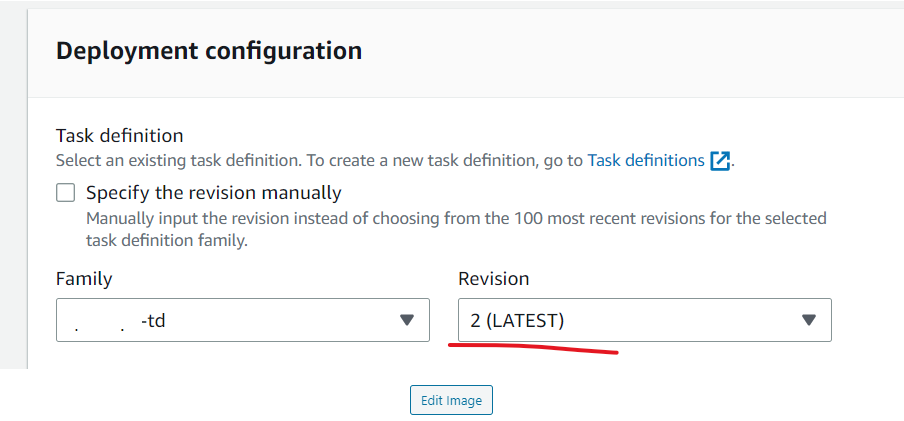
- Ensure the revision is set to Latest.
- Click the Update button to finish.

Step 5. Verify the Task Revision in ECS Service
Navigate to the Tasks tab within your ECS Service and verify that the Revision has been updated correctly.

Step 6. Run Force Deploy To Enable ECS Exec
Use the AWS CLI to force a new deployment and enable ECS Exec with the following command:
aws ecs update-service --cluster CLUSTER_NAME --service SERVICE_NAME --region REGION --enable-execute-command --force-new-deployment
Remember to replace CLUSTER_NAME and SERVICE_NAME with the actual names of your ECS Cluster and Service.
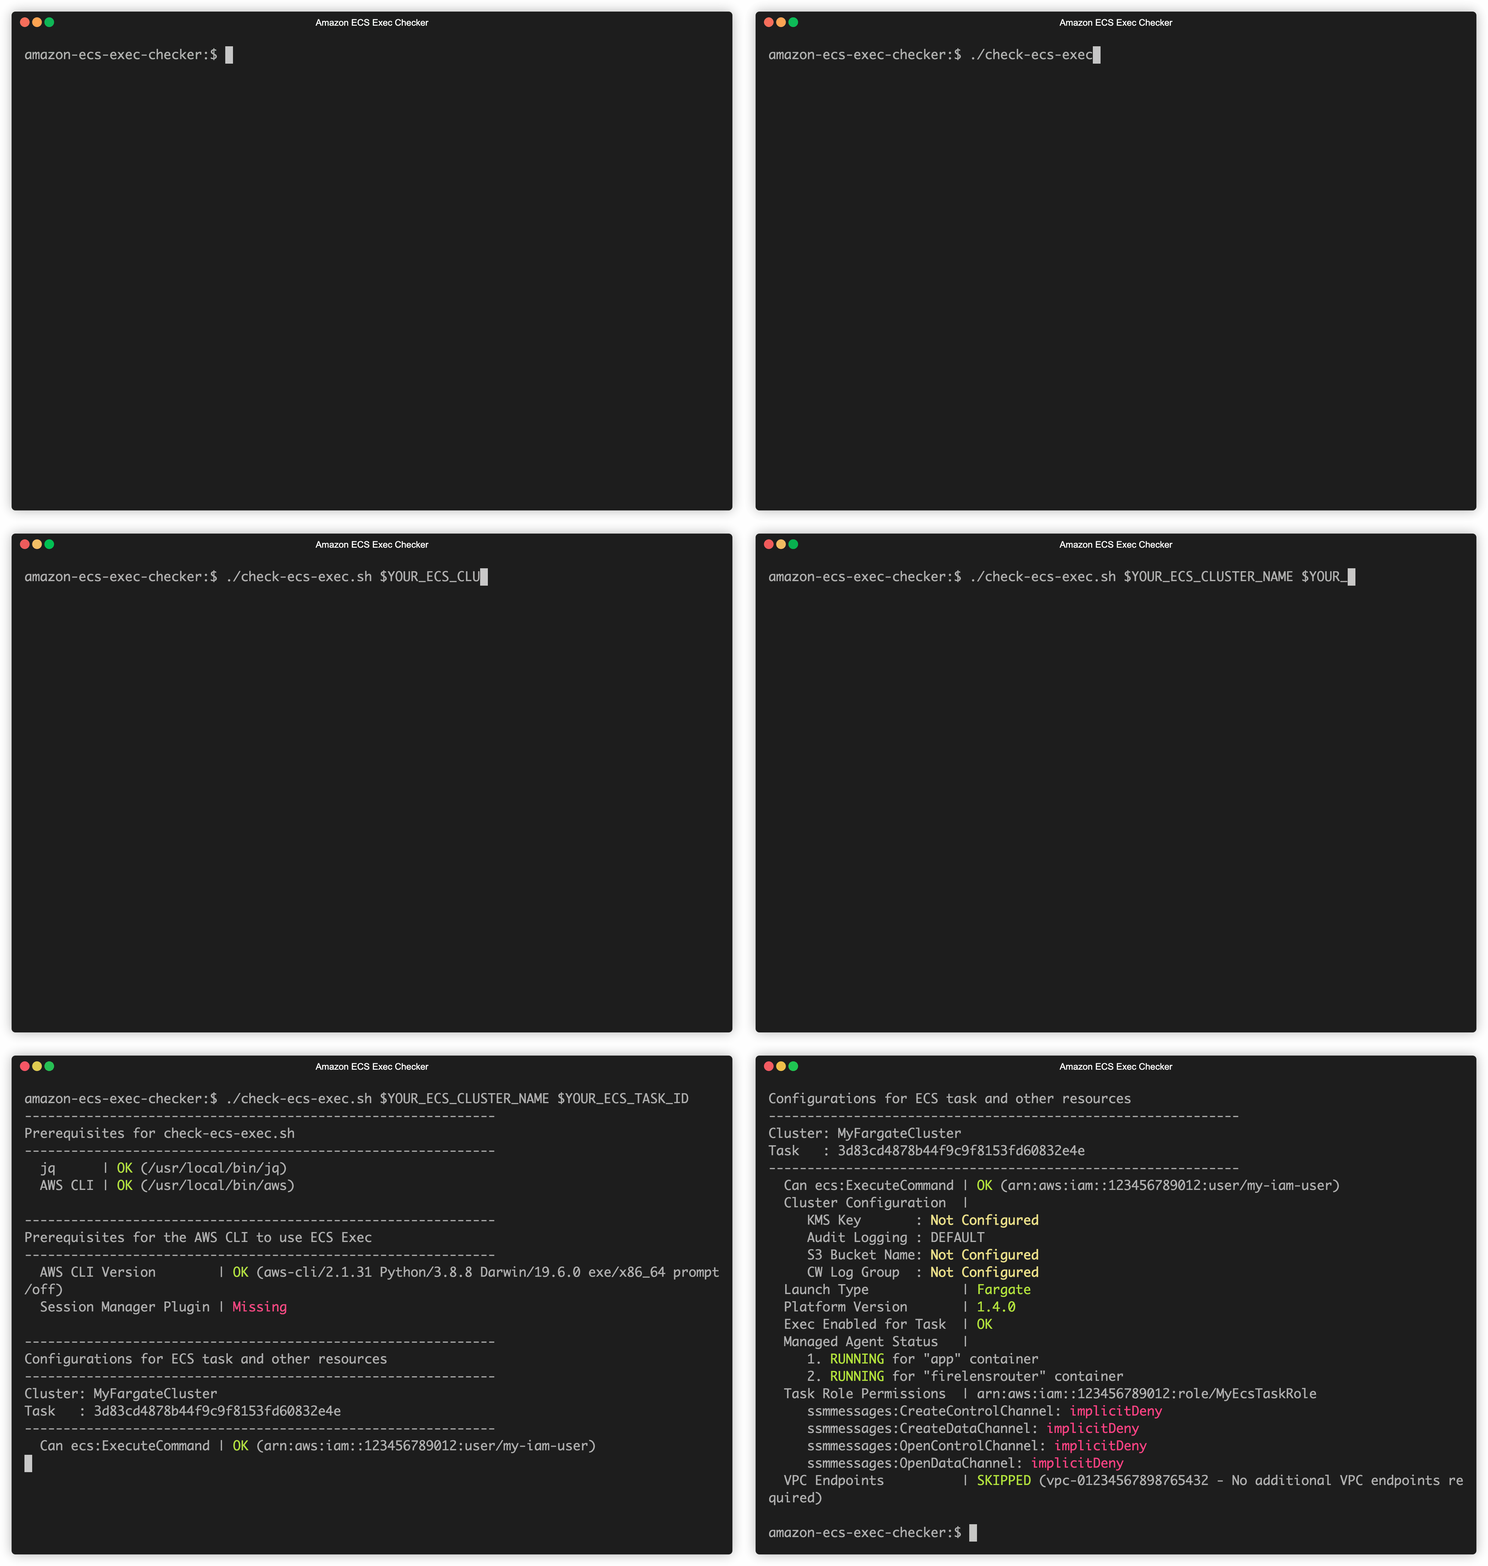
Step 7. Validate with Amazon ECS Exec Checker
You can use the Amazon ECS Exec Checker tool to verify if your ECS service/task can run ECS Exec.

Step 8. Get the ECS Task ARN
For easier CLI access, retrieve the task’s ARN by running:
TASK_ARN=$(aws ecs list-tasks --cluster CLUSTER_NAME --service SERVICE_NAME --region REGION --output text --query 'taskArns[0]')
Then, describe the task as follows:
aws ecs describe-tasks --cluster CLUSTER_NAME --region REGION --tasks $TASK_ARN
Final Step: Run ECS Exec
Finally, to access the ECS Fargate container, use this command:
aws ecs execute-command --region REGION --cluster CLUSTER_NAME --task $TASK_ARN --container CONTAINER_NAME --command "/bin/sh" --interactive
Make sure to replace CONTAINER_NAME with the name of your container.
Free Compiled Script:
Feel free to download the compiled script for easier access on the ECS container. https://github.com/imgeraldalinio/aws-ecs-exec
Conclusion
By following these steps, you can now securely access your ECS Fargate containers using ECS Exec. This feature greatly simplifies the process of managing and debugging your containerized applications.
For more detailed information and examples, read the official AWS blog post on ECS Exec:
Using Amazon ECS Exec to access your containers on Fargate and EC2
We hope this tutorial was helpful. If you have any questions or suggestions, please leave them in the comments section below.

