
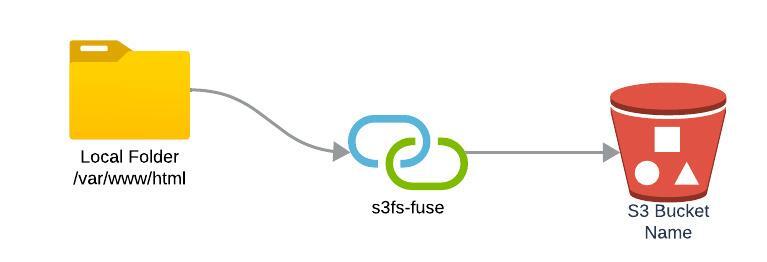
One of the most sought-after capabilities when working with cloud storage is the ability to mount an S3 bucket as a local filesystem. With s3fs-fuse, this becomes possible, allowing users to interact with their Amazon S3 buckets in a way that is seamlessly integrated with their Ubuntu 22.04 system.
In this blog post, we’ll provide step-by-step instructions on how to install and configure s3fs-fuse to mount your S3 bucket onto your Ubuntu machine.
Benefits of using s3fs-fuse
- Mount S3 buckets as local file systems.
- Treat S3 buckets like regular directories.
- Easily backup and retrieve data from S3 buckets.
Prerequisites
Before we proceed, make sure you have:
- An Amazon AWS account, register here
- An S3 bucket and credentials (Access Key ID and Secret Access Key)
- A machine running Ubuntu 22.04, EC2 deploy guide here
- A private S3 bucket created in your AWS account
Step-by-Step Guide
Step 1: Installing s3fs-fuse
First, open your terminal and install the s3fs package by using the following command:
sudo apt-get update && sudo apt-get install s3fs
This will install all necessary packages required to mount your S3 bucket.
Step 2: Configuring AWS Credentials
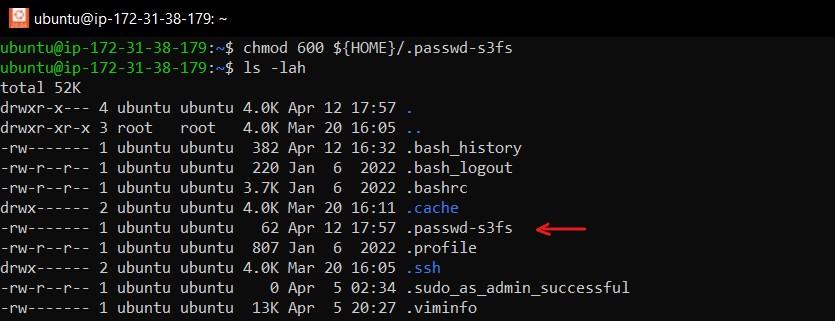
You should never hard-code your credentials. Instead, create a .passwd-s3fs file in your home directory to securely store your AWS access key ID and secret access key:
echo ACCESS_KEY_ID:SECRET_ACCESS_KEY > ${HOME}/.passwd-s3fs
chmod 600 ${HOME}/.passwd-s3fs
Replace ACCESS_KEY_ID and SECRET_ACCESS_KEY with your actual AWS credentials.
Step 3: Creating a Mount Point
Decide where you would like to mount your S3 bucket and create a directory for it:
mkdir /path/to/local/mountpoint
For example: /home/ubuntu/test-dir. This will be the location from which you’ll access your S3 files.
Step 4: Mounting the S3 Bucket
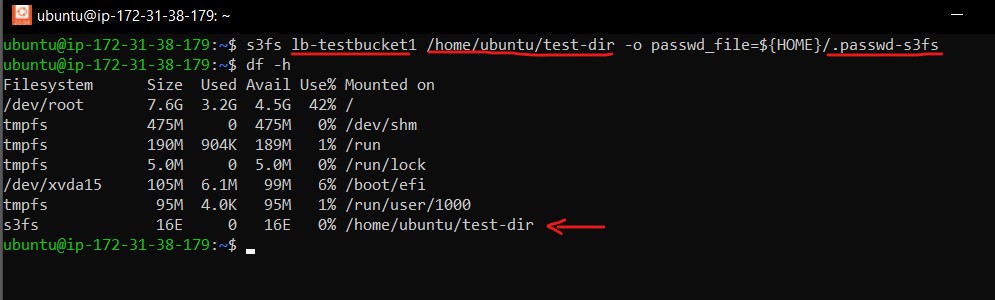
To mount your S3 bucket, you can use the following command:
s3fs mybucketname /path/to/local/mountpoint -o passwd_file=${HOME}/.passwd-s3fsReplace mybucketname with the name of your S3 bucket and /path/to/local/mountpoint with your created mount point directory.
After executing the s3fs command, type df -h. The output should look like this:
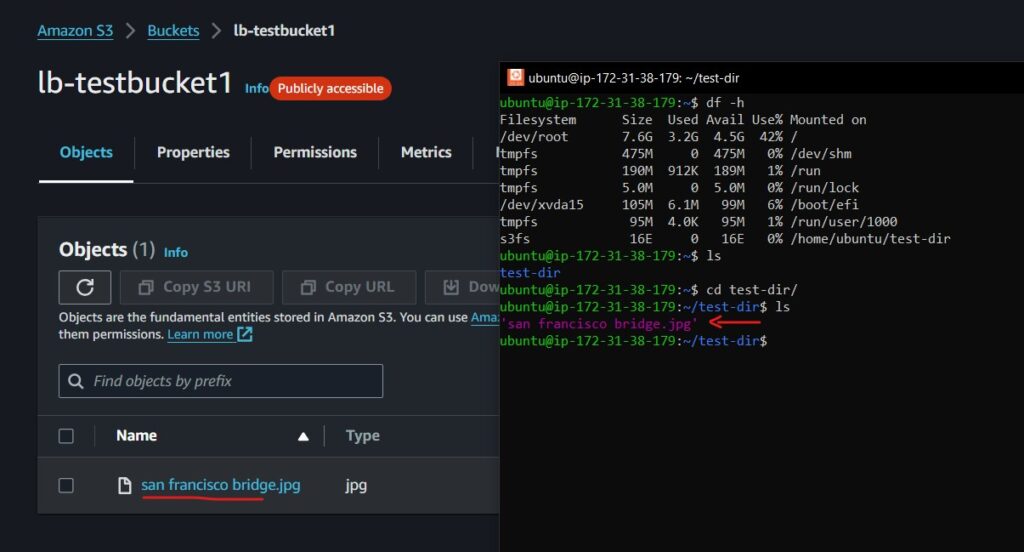
Step 5: Test and Verify Mounting of Local Directory to S3 Bucket
Here’s how I tested this functionality:
I began by uploading an image file to the mounted S3 bucket directory. Then, I checked my S3 bucket directly to verify that the image file had indeed been uploaded, confirming the successful mounting of the local directory to the S3 bucket.
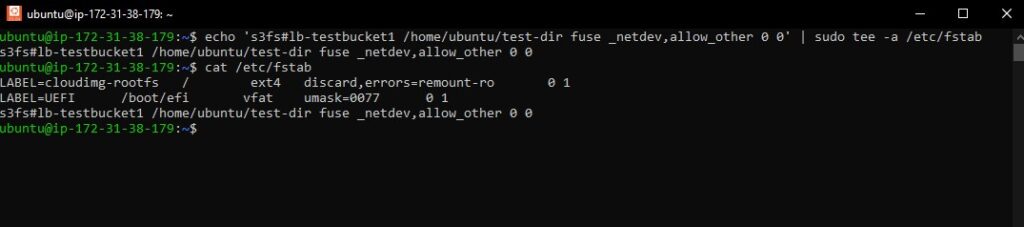
Final Step: Ensuring Persistent Mounting
To keep the S3 bucket mounted after a reboot, add an entry to your /etc/fstab file:
echo 's3fs#mybucketname /path/to/local/mountpoint fuse _netdev,allow_other 0 0' | sudo tee -a /etc/fstab
Sample Output:
Conclusion
You now have your Amazon S3 bucket mounted on your Ubuntu 22.04 system, accessible as a local file system. You can read, write, and manage your files directly through the mount point you’ve created.
Remember to handle your AWS credentials securely and test your configuration after setting it up to ensure everything works as expected.
Mounting S3 buckets locally can greatly simplify workflows that require frequent access to cloud storage, and s3fs-fuse is a powerful tool to assist with that.
A big shoutout!
Thanks to the dedicated community behind the s3fs package for Ubuntu. This invaluable tool has greatly simplified the process of mounting local folders to S3 buckets, making it accessible and user-friendly for countless users. We are truly grateful for their hard work and dedication. For more information about the s3fs package for Ubuntu, visit https://packages.ubuntu.com/focal/utils/s3fs.
Happy coding!
Need this link page old content.
Hi Bharadwaj,
If you encounter old links or content on Bing search results, I have already submitted a request to remove the old version cache. You can directly go to this link for my latest updated article: https://linuxbeast.com/blog/how-to-mount-s3-bucket-on-ubuntu-22-04-with-s3fs-fuse/