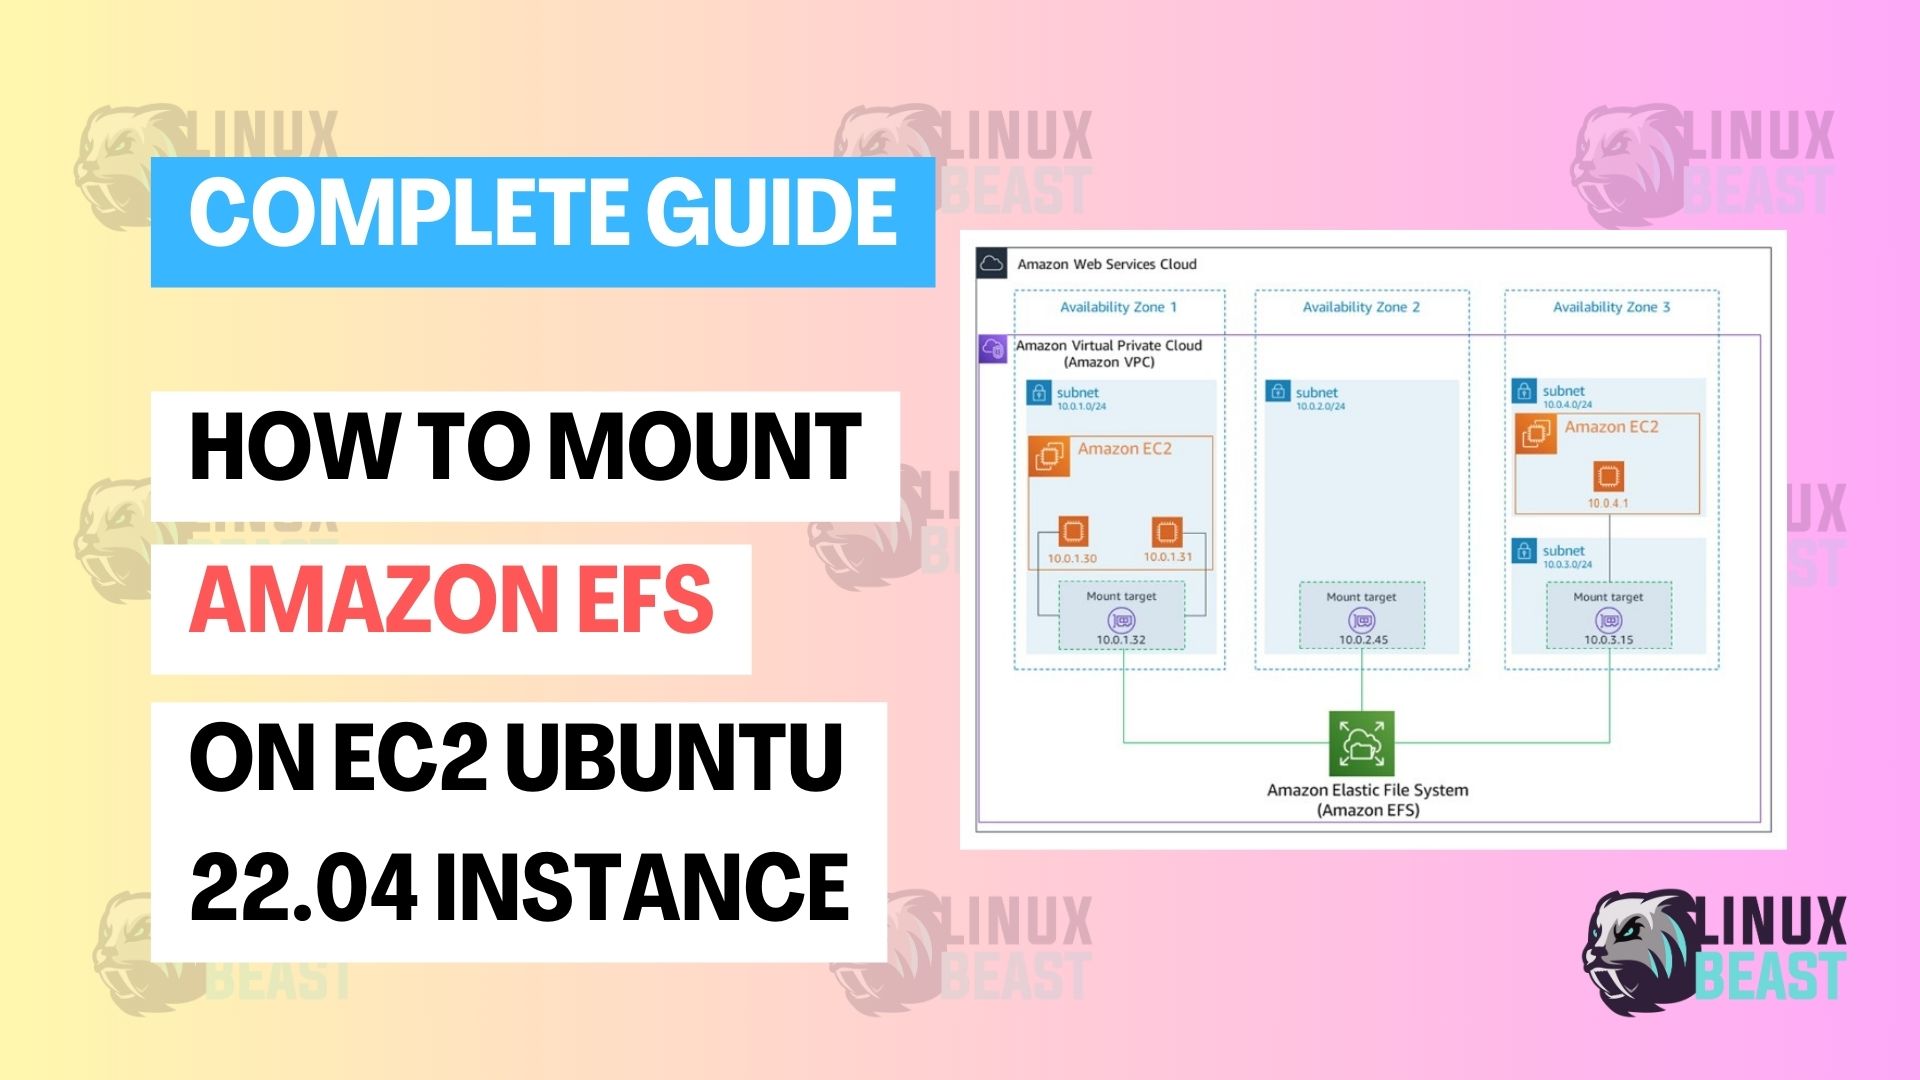
Amazon Elastic File System (EFS) is a scalable, cloud-based file storage service for use with Amazon EC2 instances. It’s highly available and durable, making it ideal for various applications and workloads. In this guide, we’ll walk you through the steps on how to mount Amazon EFS on an EC2 Ubuntu 22.04 instance.
What to do
- Update Package Repository
- Install NFS Client
- Create Amazon EFS File System
- Associate Security Group
- Mount Amazon EFS
- Configure Auto-Mounting
- Test Mounting
Prerequisites
- An AWS account
- An existing Amazon EFS file system
- An EC2 Ubuntu 22.04 instance, refer to Linuxbeast guide on how to deploy EC2 Ubuntu 22.04 on AWS
Make sure your EC2 instance has an IAM role with the necessary permissions to access EFS.
Step 1: Install NFS Client
To mount your EFS file system, you must first install the NFS client package on your Ubuntu server. This package provides a set of utilities for simplifying the mounting and using of EFS file systems.
sudo apt-get update
sudo apt-get -y install nfs-common
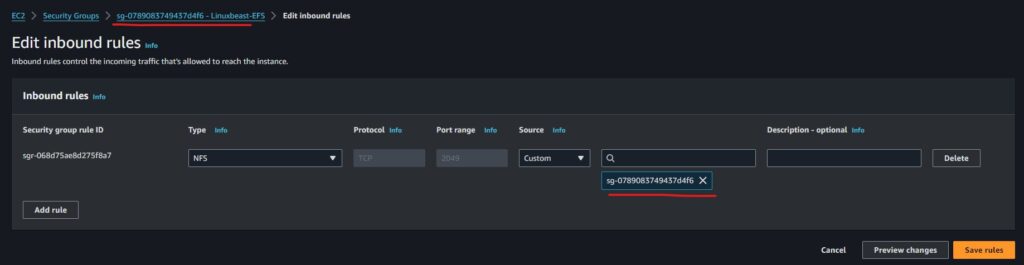
Step 2: Create a Custom Security Group
Before mounting, create your custom Security Group and set up NFS traffic to allow from your own security group ID:
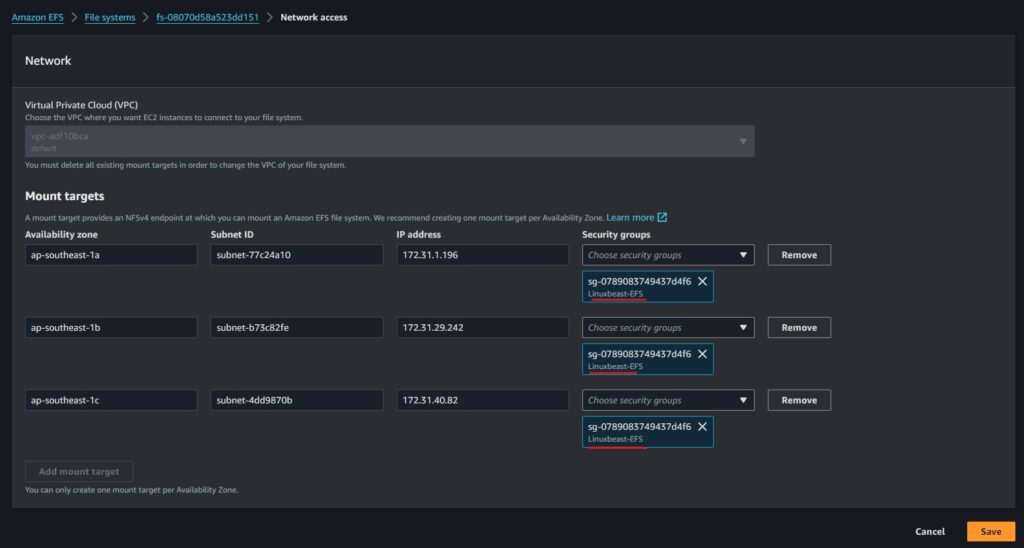
Step 3: Update EFS File System Network Configuration
Update your EFS file system’s network configuration and replace the security group with the custom security group you created, which allows NFS traffic from its own Security Group ID:
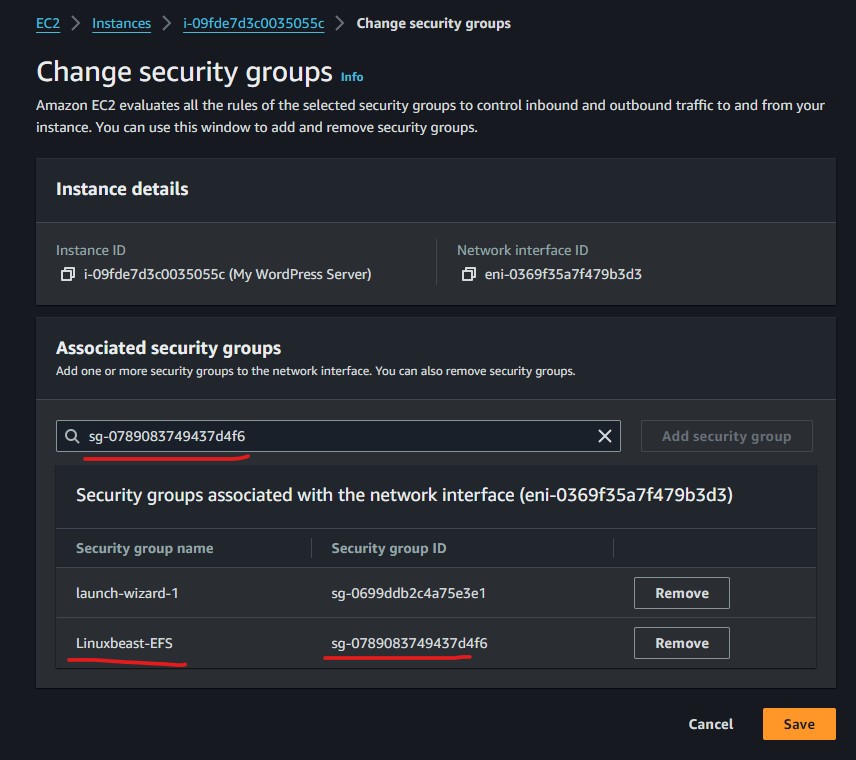
Step 4: Update EC2 Instance Security Group
Attached the new custom security group we created to your EC2 instance, which allows to your EFS file system traffic.
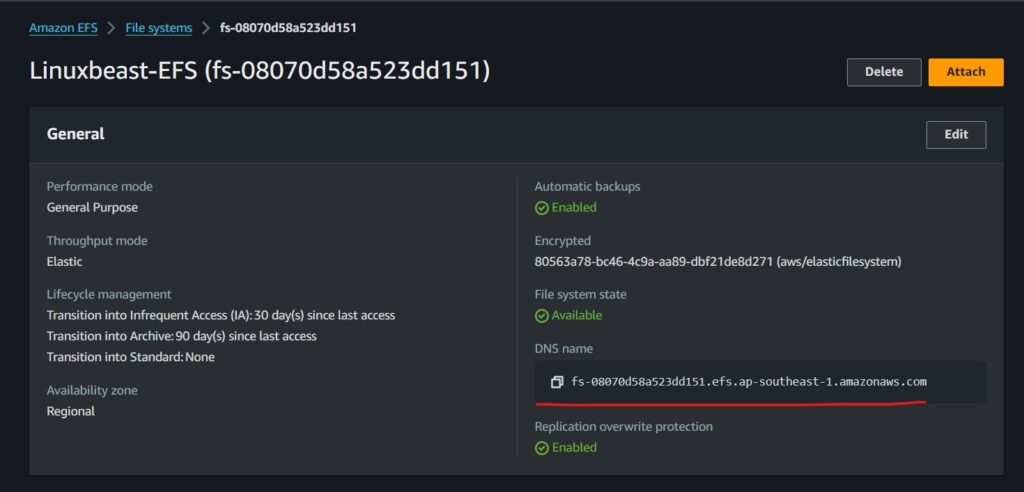
Step 5: Find Your EFS File System ID
Locate your EFS file system ID and copy the DNS name from the AWS Management Console under the EFS section.
Step 6: Create a Mount Point
Back to you EC2 instance terminal, create a directory where you would like to mount your EFS filesystem. If the directory does not exist, you can create it:
sudo mkdir /home/ubuntu/efs
Replace /home/ubuntu/efs with your own specific directory.
Step 7: Mounting the File System
Mount the EFS file system to the directory you created:
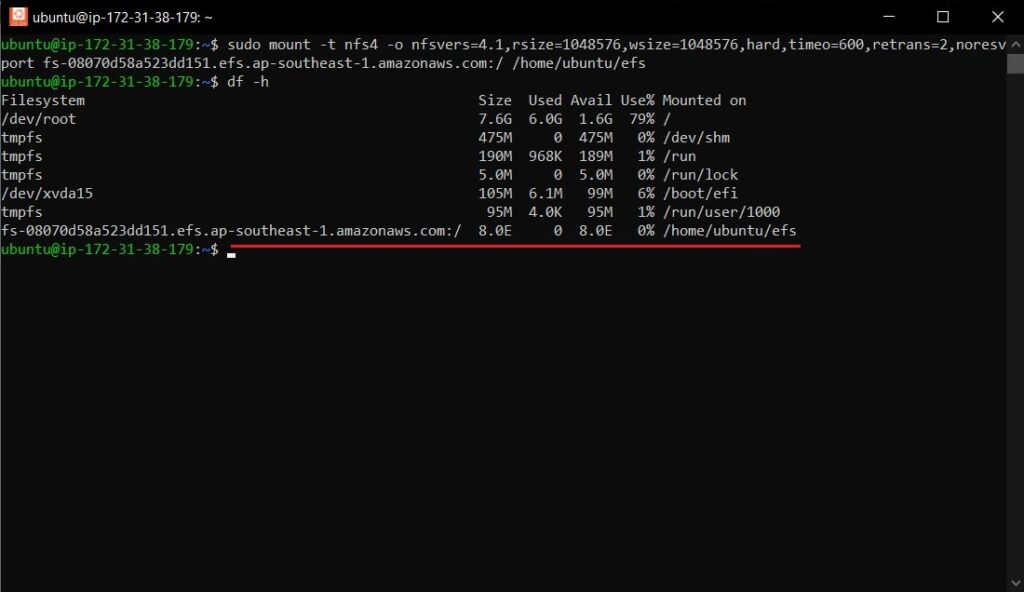
sudo mount -t nfs4 -o nfsvers=4.1,rsize=1048576,wsize=1048576,hard,timeo=600,retrans=2,noresvport fs-xxxxxxx.efs.ap-southeast-1.amazonaws.com:/ /home/ubuntu/efs
Replace fs-xxxxxx with your actual EFS file system ID.
Expected Output After Mounting EC2 with EFS:
Step 8: Automatically Mount EFS on Boot
To ensure the EFS file system is automatically mounted on boot, add it to the /etc/fstab file. Open the file with your favorite editor:
sudo nano /etc/fstab
Add the following line to /etc/fstab, again replacing fs-xxxxxx with your file system ID:
fs-xxxxxxx.efs.ap-southeast-1.amazonaws.com:/ /home/ubuntu/efs nfs4 nfsvers=4.1,rsize=1048576,wsize=1048576,hard,timeo=600,retrans=2,noresvport,_netdev 0 0
Here’s what each option means:
nfsvers=4.1: Use NFS version 4.1.rsize=1048576: Set the read size to 1MB.wsize=1048576: Set the write size to 1MB.hard: Use hard mount options.timeo=600: The time in deciseconds (tenths of a second) the NFS client will retry a request.retrans=2: The number of times the NFS client will retry a request before it attempts further recovery actions.noresvport: Tell NFS not to use reserved ports._netdev: This option ensures that the network is up before trying to mount the filesystem.0 0: These are the dump and fsck options respectively. Setting them to 0 disables them for this mount.
Save and exit the editor.
Step 9: Test the mount command
Before rebooting, it’s a good idea to test that the entry works, manually type the mount command using:
sudo mount -a
This command will attempt to mount all filesystems mentioned in /etc/fstab.
Step 10: Verify the mount
Check that the EFS has been mounted successfully by running:
df -hT
You should see your EFS listed in the output:
Final Step: Testing the Mount
After mounting, test that you can write to the EFS:
echo "Hello EFS" | sudo tee /home/ubuntu/efs/testfile.txt
cat /home/ubuntu/efs/testfile.txt
Monitoring and Troubleshooting
Monitoring with CloudWatch
Amazon EFS integrates with Amazon CloudWatch to monitor the file system’s performance. You can navigate to the CloudWatch console to review metrics and set alarms for your EFS system.
Handling Limits
Be aware of Amazon EFS limits to ensure you operate within the service’s thresholds for optimal performance.
Troubleshooting
Consult the Amazon EFS Troubleshooting Guide for common issues and resolutions if you encounter any errors.
Conclusion
Mounting Amazon EFS on an Ubuntu EC2 instance is straightforward with amazon-efs-utils. By following the steps provided in this guide, you can quickly set up a resilient and scalable file storage system for your cloud applications. Remember to always monitor and manage your EFS to adhere to AWS best practices and avoid potential pitfalls.
For further insights how Amazon EFS works, visit: https://docs.aws.amazon.com/efs/latest/ug/how-it-works.html