Setting up a MySQL database server on your EC2 Ubuntu 22.04 LTS instance can be done by following these steps. In this guide, we’ll also configure the server for remote connections, which is useful if you need to manage your database from a different location.
What to do
- Install MySQL Server
- Configure MySQL Server
- Adjust Bind Address
- Secure MySQL Installation (Optional)
- Restart MySQL Service
- Validate MySQL Service Status
- Create MySQL User for Remote Access
- Update Firewall Rules
- Test the Connection
Prerequisites
- An EC2 Ubuntu 22.04 instance, refer to Linuxbeast guide on how to deploy EC2 Ubuntu 22.04 on AWS
- You should connect first to your EC2 instance via SSH.
- You’ll need root or sudo privileges to execute commands.
- Familiarity with basic command line operations in Linux.
Step 1: Install MySQL Server
Begin by updating your package index, then install the MySQL server package:
sudo apt update
sudo apt install mysql-server
Step 2: Configure MySQL Server
After the installation is complete, you need to adjust configurations for MySQL.
Adjust Bind Address
MySQL needs to listen for remote connections:
sudo vim /etc/mysql/mysql.conf.d/mysqld.cnf
In the configuration file, find the bind-address line and change it to:
bind-address = 0.0.0.0
This setting allows MySQL to accept connections on all network interfaces.
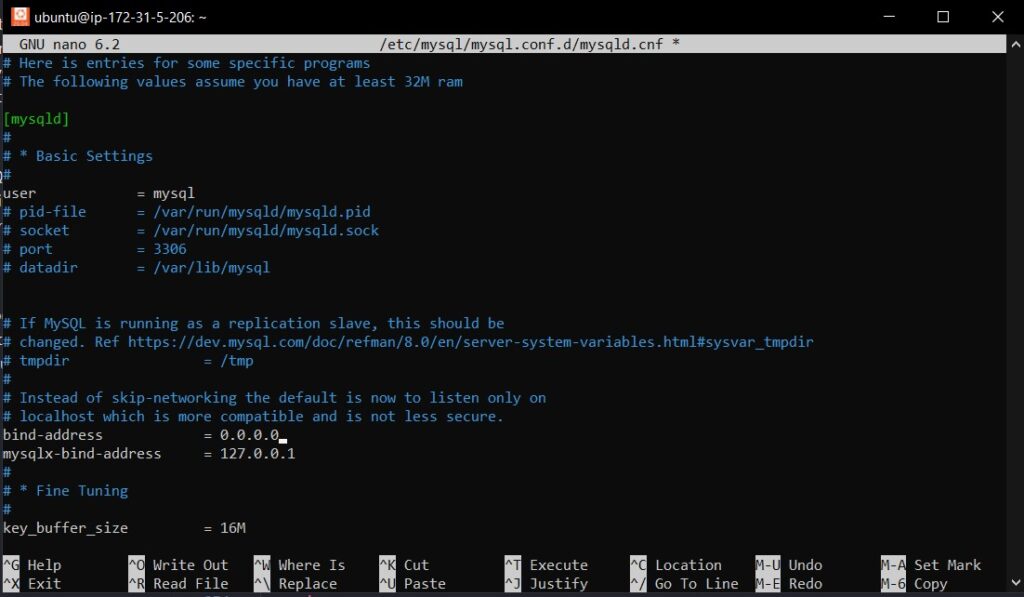
To save the changes and exit Nano editor, press Ctrl + O to write the file, then press Enter to confirm the filename, and finally press Ctrl + X to exit Nano.
Secure MySQL Installation (Optional)
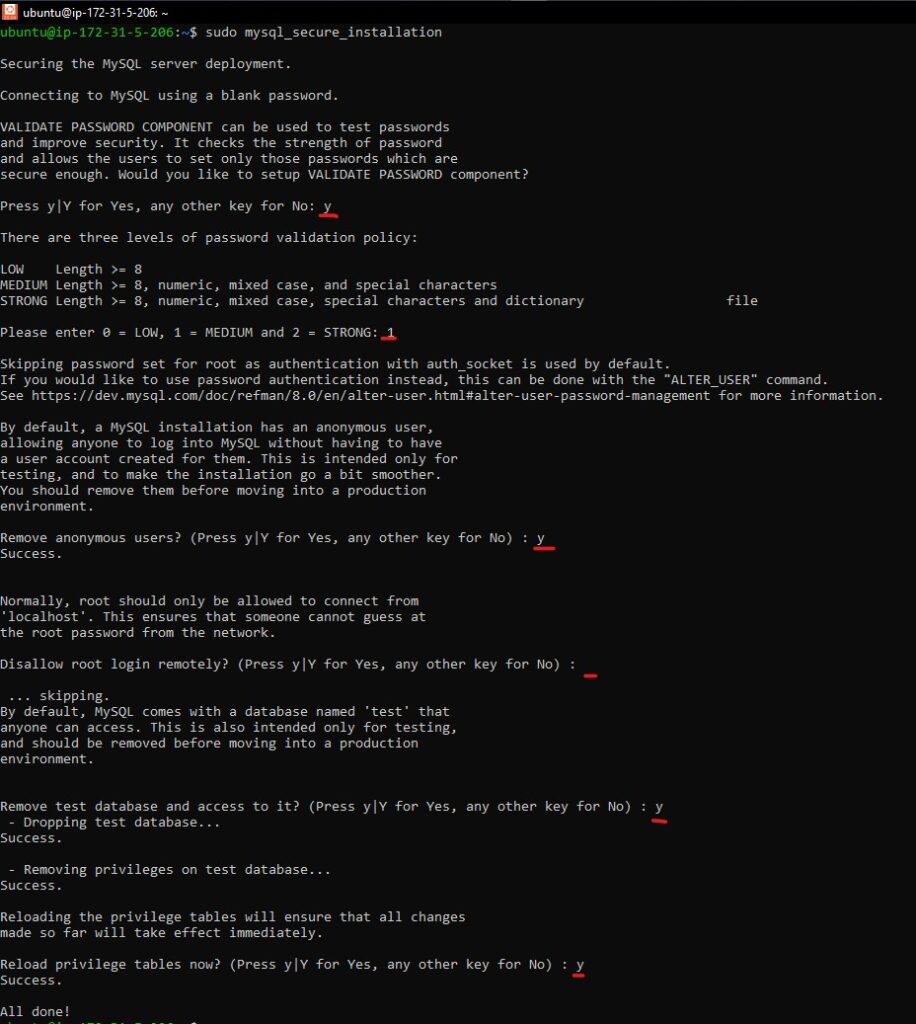
It’s recommended to run the security script that comes with MySQL:
sudo mysql_secure_installation
Follow the prompts to set a root password, remove anonymous users, disallow root login remotely, and remove the test database.
Step 3: Restart MySQL Service
Apply the changes by restarting the MySQL service:
sudo systemctl restart mysql
Step 4: Validate MySQL Service Status
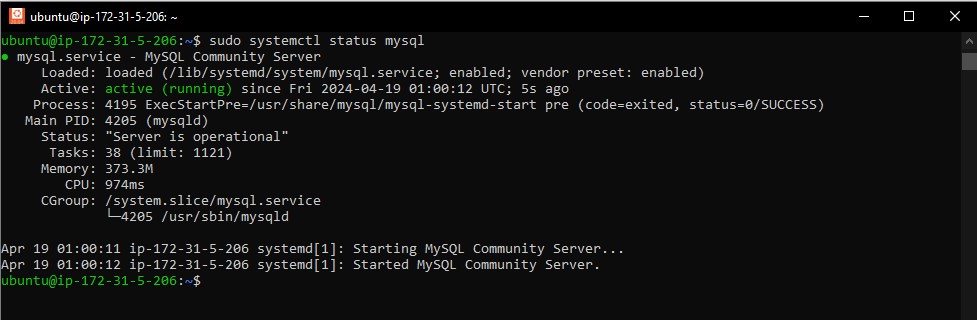
Run the following command to check the status of the MySQL service:
sudo systemctl status mysql
Expected Output:
Step 5: Create MySQL User for Remote Access
The default root user in MySQL is set to connect only locally. To perform operations from remote locations, you’ll need a dedicated user.
Access MySQL as the root user:
sudo mysql -u root -p
Then, create a new user and grant privileges. Replace 'myuser' and 'mypassword' with your desired username and strong password:
CREATE USER 'myuser'@'%' IDENTIFIED BY 'mypassword';
GRANT ALL PRIVILEGES ON *.* TO 'myuser'@'%' WITH GRANT OPTION;
FLUSH PRIVILEGES;
Exit MySQL:
EXIT;
The % symbol allows the user to connect from any host, enhancing accessibility.
Step 6: Update Firewall Rules
If you have the UFW firewall enabled on your Ubuntu, you need to allow MySQL traffic:
sudo ufw allow 3306/tcp
In your AWS cloud environment, remember to adjust your EC2 instance security group rules to permit connections over port 3306:
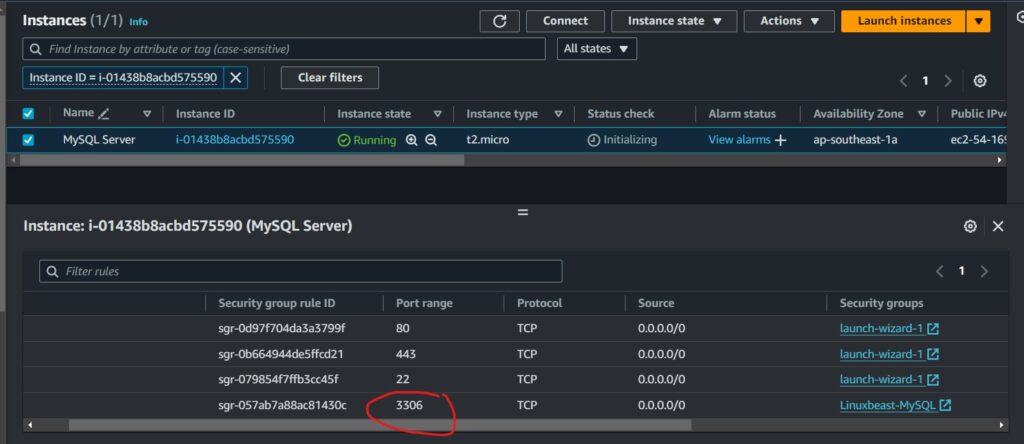
In this case, I’ve used the IP range 0.0.0.0/0 to open port 3306, allowing connections from anywhere. However, it’s best practice to specify an IP address of the client to restrict access to the database.
Step 7: Test the Connection
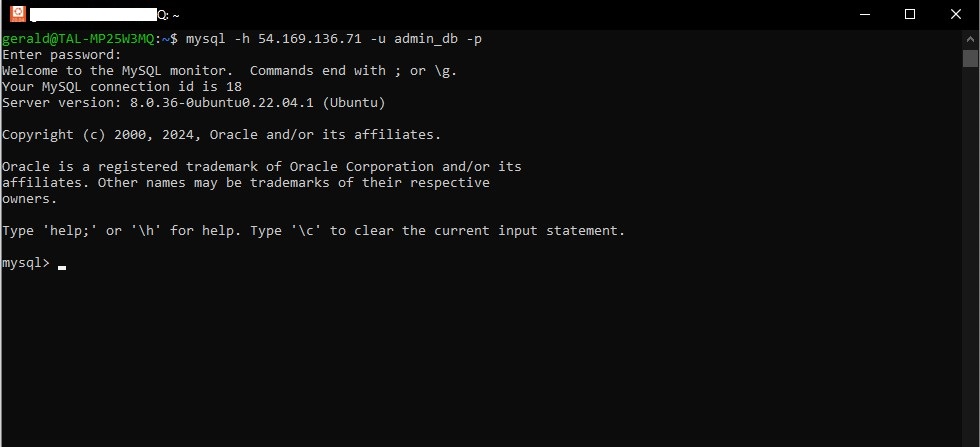
From a remote machine, attempt to connect to your MySQL server:
mysql -h your_ec2_ip -u myuser -p
Replace your_ec2_ip with the public IP address of your EC2 instance MySQL server. Here, myuser is the username of the MySQL account you created, and you will be prompted for the password.
Step 8: Managing MySQL Service
Manage your MySQL service with systemctl commands. For example, to stop MySQL, use:
sudo systemctl stop mysql.service
To start it again, use:
sudo systemctl start mysql.service
To ensure MySQL starts automatically at boot, enable it with:
sudo systemctl enable mysql.service
Final Step: Uninstall MySQL Database
If MongoDB is no longer needed, you can uninstall it by performing this guide: How to Completely Remove (Purge) MySQL Server from Ubuntu 22.04
Conclusion
Congratulations! You have successfully installed and configured MySQL on EC2 Ubuntu 22.04 LTS to accept remote connections. Remember that managing remote access to your database should be done carefully, prioritizing security practices such as using strong passwords, VPNs, or SSH tunneling, and limiting connections to trusted hosts.