If you work in WSL and access files from your Windows drives, you’ve probably seen Zone.Identifier files appearing next to your actual files. These are hidden metadata files that Windows creates when you download something from the internet. They’re harmless on Windows, but in WSL they show up as visible files and clutter your directories.
This guide covers how to remove existing Zone.Identifier files and how to stop Windows from creating new ones.
What Are Zone.Identifier Files?
When you download a file in Windows (from a browser, email, etc.), Windows attaches a hidden Alternate Data Stream (ADS) called Zone.Identifier to it. This marks the file as coming from the internet so Windows can show security warnings when you try to open it.
On Windows, this data is invisible. But when you access files through WSL’s /mnt/c/ mount, the ADS shows up as a separate file:
ls /mnt/c/Users/yourname/Downloads/
setup.exe
setup.exe:Zone.Identifier
report.pdf
report.pdf:Zone.Identifier
They don’t cause any real harm, but they make directory listings messy and can cause issues with scripts that process all files in a folder.
Remove Existing Zone.Identifier Files
Delete all Zone.Identifier files in the current directory and its subdirectories:
find . -name "*:Zone.Identifier" -type f -delete-name "*:Zone.Identifier"— matches any file ending with:Zone.Identifier-type f— only matches files, not directories-delete— removes each match
To preview what would be deleted before actually removing anything, run it without -delete first:
find . -name "*:Zone.Identifier" -type fStop Windows from Creating Zone.Identifier Files
Removing existing files is a one-time fix. To prevent Windows from attaching zone information to new downloads, you need to change a Windows policy setting.
Option A: Group Policy Editor (Windows Pro / Enterprise)
If you’re on Windows Pro or Enterprise, use the Group Policy Editor:
- Press
Win + R, typegpedit.msc, and hit Enter - Navigate to User Configuration > Administrative Templates > Windows Components > Attachment Manager
- Double-click Do not preserve zone information in file attachments
- Set it to Enabled and click OK
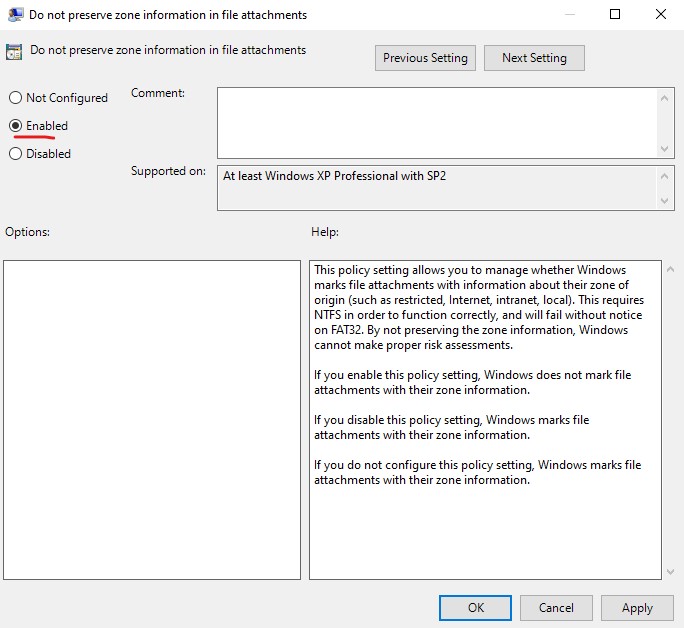
New downloads will no longer get zone information attached.
Option B: Registry Edit (Windows Home)
Windows Home doesn’t include gpedit.msc. Use a registry edit instead. Open PowerShell as Administrator and run:
reg add "HKCU\Software\Microsoft\Windows\CurrentVersion\Policies\Attachments" /v SaveZoneInformation /t REG_DWORD /d 1 /fThis creates the same setting as the Group Policy option. To undo it later:
reg delete "HKCU\Software\Microsoft\Windows\CurrentVersion\Policies\Attachments" /v SaveZoneInformation /fNote: Disabling zone information means Windows will no longer warn you when opening files downloaded from the internet. This is a minor security trade-off. If you only work with trusted files, it’s fine.
Keep Project Files in the WSL Filesystem
The best way to avoid Zone.Identifier files entirely is to keep your project files inside WSL’s own filesystem — your home directory (~) — instead of on /mnt/c/.
Files in the WSL filesystem don’t get Windows ADS metadata. As a bonus, file operations are much faster inside WSL than on the mounted Windows drive. If you use VS Code, you can open your WSL files directly — see How to Connect Visual Studio Code with WSL 2 for Linux Ubuntu.
Ignore Zone.Identifier Files in Git
If you’re working in a Git repo on /mnt/c/ and don’t want to accidentally commit Zone.Identifier files, add them to your .gitignore:
*:Zone.IdentifierOr add it to your global gitignore so it applies to all repos:
echo "*:Zone.Identifier" >> ~/.gitignore_global
git config --global core.excludesfile ~/.gitignore_global
Conclusion
Zone.Identifier files are a Windows security feature that leaks into WSL as visible files. You can delete them with find, prevent new ones with a Group Policy or registry change, or avoid them altogether by working inside the WSL filesystem.
For more WSL setup tips, check out How to Install Ubuntu in WSL 2 on Windows or How to Make Resolve Config Changes Permanent in WSL 2.