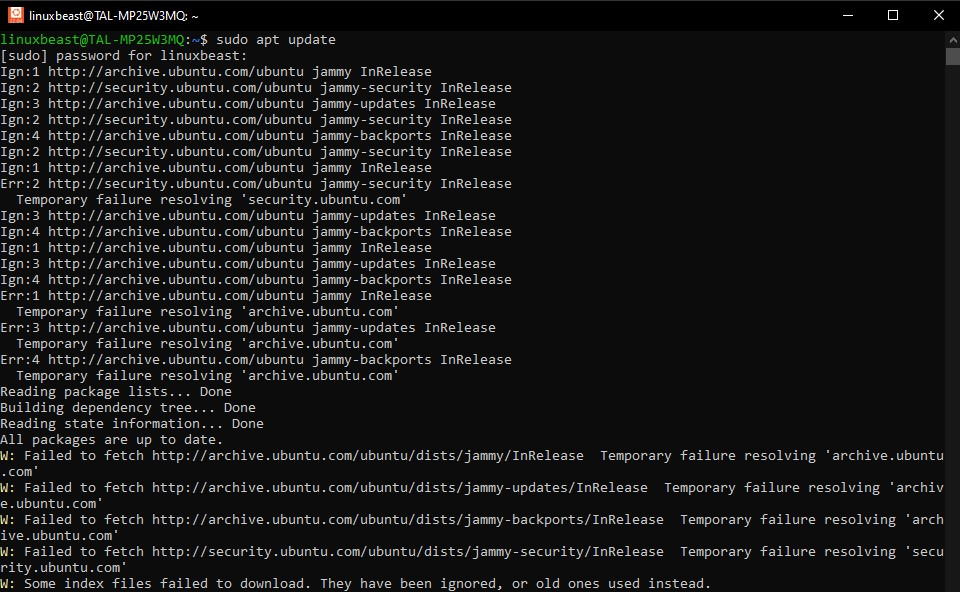
When working with Windows Subsystem for Linux (WSL) 2, users often encounter an issue where changes made to the /etc/resolv.conf file are not persistent after a reboot. This can be frustrating, especially for developers who need to maintain specific configurations for networking or DNS settings within their Linux subsystem.
The Root Cause
The primary reason for this behavior is that by default, WSL 2 is designed to generate the /etc/resolv.conf file automatically whenever you start your WSL 2 instance. This automated process ensures that the subsystem’s DNS settings stay synchronized with those of the host Windows system. Consequently, any manual edits to /etc/resolv.conf get overwritten upon restart.
The Solution
To resolve this and make your changes permanent, you will need to tell WSL not to generate the /etc/resolv.conf file automatically. Here’s how:
Step 1. Stop the Automatic Generation of /etc/resolv.conf
Open your WSL terminal. Edit the WSL configuration file using your preferred text editor. If you do not have one installed, nano is a good option:
sudo nano /etc/wsl.conf
Add the following content to wsl.conf:
[boot]
systemd=true

[network]
generateResolvConf = false
Save (Ctrl+O) and close (Ctrl+X) the file.
Step 2. Create Your Custom /etc/resolv.conf File
After disabling the automatic generation, you’ll need to create a new resolv.conf that will remain unchanged across reboots.
Rename or backup the existing /etc/resolv.conf file to avoid conflicts:
sudo mv /etc/resolv.conf /etc/resolv.conf.bak
Create a new /etc/resolv.conf file using your text editor:
sudo nano /etc/resolv.conf
Add your desired DNS configurations. For example:
nameserver 8.8.8.8
nameserver 8.8.4.4
These IP addresses are for Google’s DNS servers; replace them with your preferred DNS servers if necessary.
Save (Ctrl+O) and close (Ctrl+X) the file.
Step 3. Making It Read-Only
Optionally, to prevent other processes from altering your custom resolv.conf, you can set it as immutable using the chattr command:
sudo chattr +i /etc/resolv.conf
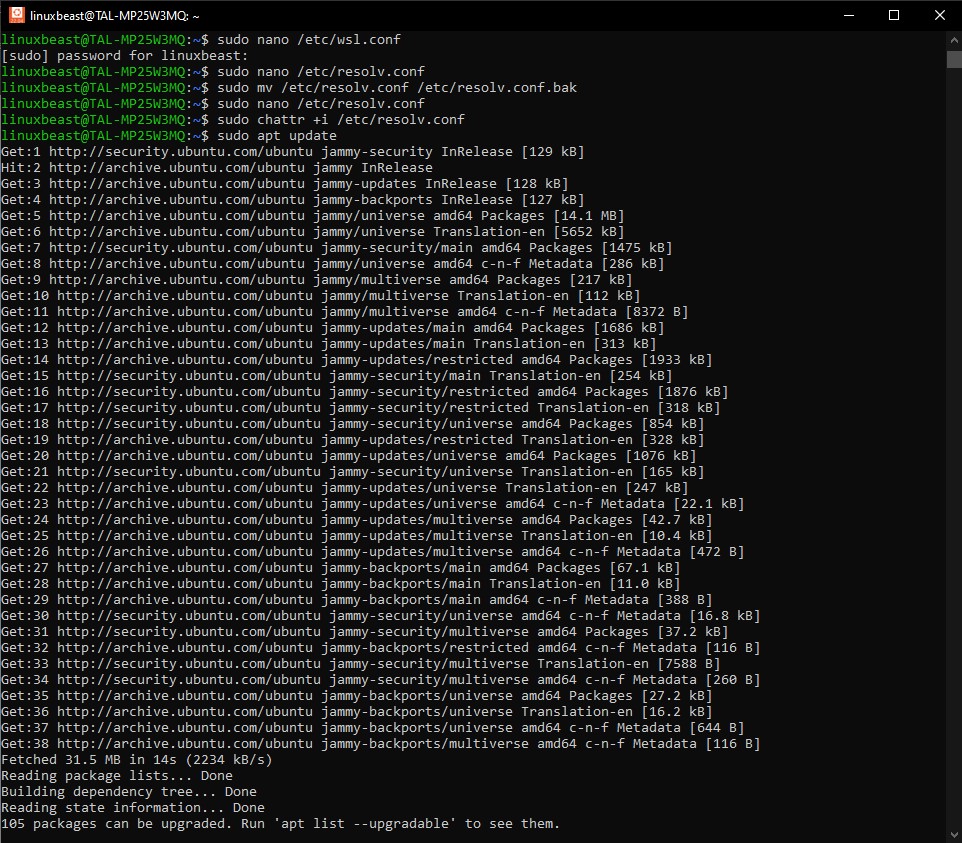
Here’s an example of a successful update after configuring the Resolve Config File:


You can also check out this blog post at https://linuxbeast.com/blog/resolving-internet-connection-issues-in-wsl-2-on-ubuntu-20-04/ if you come across similar issues.
Conclusion
After completing these steps, your WSL 2 environment will use your specified DNS settings persistently. No longer will your changes to /etc/resolv.conf be lost on a restart. This can greatly improve your workflow and ensure consistent network configurations for development and other tasks. Remember that if you ever want to revert to the default settings, you can simply delete the /etc/wsl.conf modifications and return /etc/resolv.conf to its original state or set the generateResolvConf back to true.

