VS Code can connect to WSL 2 and run directly inside your Linux environment. The terminal, file system, extensions, and debugging all operate in Ubuntu — not Windows. This means you edit files, run build commands, and use Linux tools without leaving VS Code.
Prerequisites
- WSL 2 with Ubuntu installed — follow How to Install Ubuntu 20.04 or 22.04 in WSL 2 on Windows 10 if you haven’t set this up yet
- VS Code installed on Windows (not inside WSL)
Install the WSL Extension
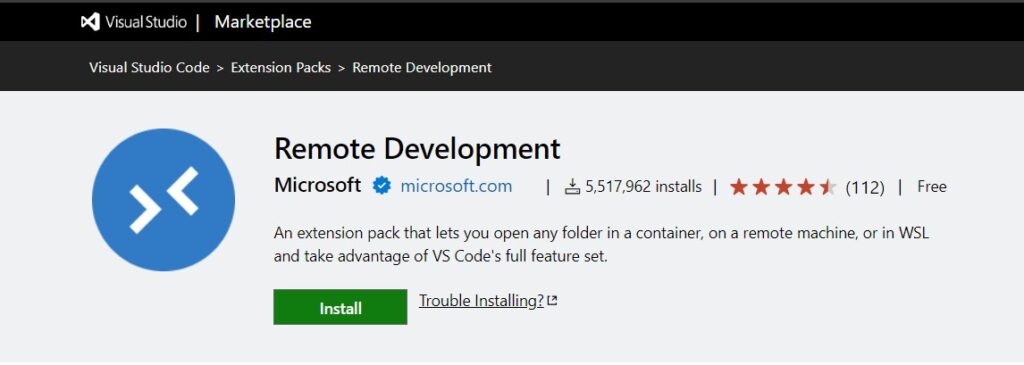
The WSL extension (published by Microsoft as ms-vscode-remote.remote-wsl) is what connects VS Code on Windows to your WSL 2 instance. Install it from the Extensions sidebar:
- Open VS Code on Windows
- Press
Ctrl+Shift+Xto open the Extensions view - Search for WSL
- Install the one by Microsoft
You can also install the Remote Development extension pack, which bundles the WSL extension together with Remote – SSH and Dev Containers.
Connect VS Code to WSL 2
There are two ways to open a project inside WSL 2. The terminal method is the fastest.
Option A: From the WSL terminal (recommended)
Open your WSL Ubuntu terminal, navigate to your project directory, and run:
cd ~/my-project
code .
VS Code launches on Windows and automatically connects to WSL 2. The first time you run this, VS Code installs a small server component inside WSL — this takes a few seconds.
You can also open a specific file directly:
code ~/my-project/src/app.pyOption B: From VS Code
- Click the blue Remote Window button in the bottom-left corner of VS Code (or press
Ctrl+Shift+Pand search forWSL: Connect to WSL) - Select Connect to WSL (or Connect to WSL using Distro if you have multiple distros)
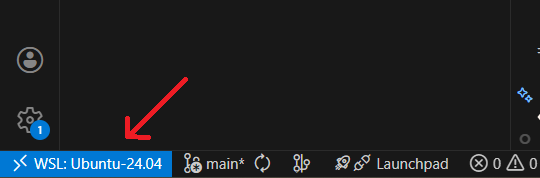
- A new VS Code window opens connected to WSL — you’ll see WSL: Ubuntu in the bottom-left status bar
- Go to File > Open Folder and navigate to your project (e.g.,
/home/yourusername/my-project)
Verify the Connection
Once connected, confirm you’re running inside WSL:
- The status bar in the bottom-left shows WSL: Ubuntu
- Open the integrated terminal (
Ctrl+`) — it should be a Bash or Zsh shell inside WSL, not PowerShell - Run
uname -ain the terminal — it should show a Linux kernel version
Install Extensions in WSL
VS Code treats Windows and WSL as separate environments. Extensions installed on the Windows side don’t automatically run in WSL. When you open a project in WSL, VS Code shows a prompt to install missing extensions, or you can install them manually from the Extensions sidebar.
Some extensions run on the Windows side (themes, keybindings), but anything that interacts with files, terminals, or language servers needs to be installed in WSL. VS Code handles this — just click “Install in WSL: Ubuntu” when prompted.
Set the Default Terminal Profile
When connected to WSL, VS Code should default to Bash. If it opens PowerShell instead, set the default terminal profile:
- Press
Ctrl+Shift+Pand search for Terminal: Select Default Profile - Select bash (or zsh if you use Oh My Posh or another Zsh setup)
For customizing your WSL terminal appearance, see How to Make Your WSL Ubuntu Terminal Look Better with Oh My Posh.
Tips for Working in WSL
| Tip | Details |
|---|---|
| Keep files in the Linux filesystem | Store projects under /home/yourusername/, not /mnt/c/. Accessing Windows drives from WSL is slow due to cross-filesystem overhead. |
| Git inside WSL | Install Git in WSL (sudo apt install git) and configure it there. VS Code uses WSL’s Git when connected. |
| Node.js and Python | Install language runtimes inside WSL, not on Windows. VS Code picks them up automatically when connected. |
| Port forwarding | VS Code auto-forwards ports from WSL to Windows. If you run a dev server on port 3000 in WSL, it’s accessible at localhost:3000 in your Windows browser. |
Troubleshooting
“code” command not found in WSL
Make sure VS Code is added to your Windows PATH (this is enabled by default during installation). Close and reopen your WSL terminal after installing VS Code. If it still doesn’t work, check that /mnt/c/Users/YourName/AppData/Local/Programs/Microsoft VS Code/bin is in your WSL $PATH.
WSL extension not connecting
If VS Code hangs when connecting to WSL, try:
- Restart WSL: run
wsl --shutdownin PowerShell, then reopen your terminal - Delete the VS Code server in WSL:
rm -rf ~/.vscode-serverand reconnect - Update both VS Code and the WSL extension to the latest version
For MCP-related startup issues in VS Code on WSL, see Global MCP Server Configuration in VS Code WSL: Fixing Startup Errors.
Conclusion
With the WSL extension installed, code . from your WSL terminal is all you need to start editing. Your terminal, extensions, and language tools all run inside Linux while VS Code stays on Windows.
Next, you might want to set up your language tools inside WSL — see How to Install and manage Python Versions on WSL Ubuntu or How to Switch Node.js Version in WSL Ubuntu.