This guide walks you through setting up Terraform on WSL Ubuntu so you can provision AWS resources from Windows. By the end, you’ll have Terraform installed, connected to AWS, and you’ll create an S3 bucket as a working example.
The examples in this guide are run on WSL2 Ubuntu in Windows, but they work the same on any Ubuntu system.
Prerequisites
- WSL2 with Ubuntu installed — see How to Install Ubuntu 20.04 or 22.04 in WSL 2 on Windows 10
- AWS CLI v2 installed and configured with credentials — see How to Install AWS CLI v2 on Ubuntu 22.04
- An AWS account with permissions to create S3 buckets (or whatever resource you plan to provision)
Step 1: Install Terraform
Install Terraform from the official HashiCorp apt repository. This lets you update Terraform through apt upgrade in the future.
Install dependencies
sudo apt update && sudo apt install -y gnupg software-properties-commonAdd the HashiCorp GPG key and repository
wget -O - https://apt.releases.hashicorp.com/gpg | sudo gpg --dearmor -o /usr/share/keyrings/hashicorp-archive-keyring.gpgecho "deb [arch=$(dpkg --print-architecture) signed-by=/usr/share/keyrings/hashicorp-archive-keyring.gpg] https://apt.releases.hashicorp.com $(lsb_release -cs) main" | sudo tee /etc/apt/sources.list.d/hashicorp.listInstall Terraform
sudo apt update && sudo apt install terraform -yVerify the installation
terraform -versionYou should see the installed version number. If you need a specific version later, see How to Upgrade Terraform to a Specific Version.
Step 2: Verify AWS Credentials
Terraform uses the same credentials as the AWS CLI. If you already configured aws configure, you’re set. Verify your credentials are working:
aws sts get-caller-identityThis should return your AWS account ID, user ARN, and user ID. If it fails, run aws configure and enter your access key, secret key, and default region.
Step 3: Create a Terraform Configuration
Create a project directory and a Terraform configuration file that defines an S3 bucket:
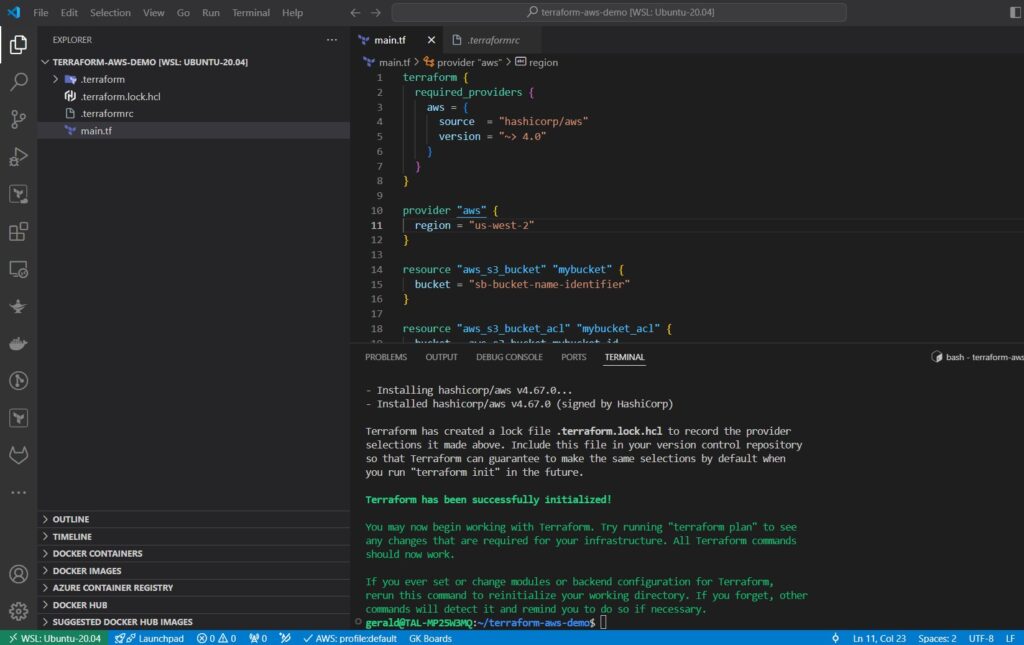
mkdir ~/terraform-demo && cd ~/terraform-demoCreate main.tf:
nano main.tfAdd this configuration:
terraform {
  required_providers {
    aws = {
      source  = "hashicorp/aws"
      version = "~> 5.0"
    }
  }

  required_version = ">= 1.0"
}

provider "aws" {
  region = "ap-southeast-1"
}

resource "aws_s3_bucket" "demo" {
  bucket = "sb-bucket-name-identifier"

  tags = {
    Name        = "Terraform Demo Bucket"
    Environment = "dev"
    ManagedBy   = "terraform"
  }
}

resource "aws_s3_bucket_acl" "demo_acl" {
  bucket = aws_s3_bucket.demo.id
  acl    = "private"
}

resource "aws_s3_bucket_public_access_block" "demo_block" {
  bucket = aws_s3_bucket.demo.id

  block_public_acls       = true
  block_public_policy     = true
  ignore_public_acls      = true
  restrict_public_buckets = true
}
Replace the bucket name with something unique — S3 bucket names are globally unique across all AWS accounts. Change the region to your preferred AWS region.
Step 4: Initialize Terraform
terraform initThis downloads the AWS provider plugin and sets up the working directory. You should see “Terraform has been successfully initialized!” in the output.
If you get a timeout error (common on WSL due to DNS issues), set a longer timeout:
export TF_REGISTRY_CLIENT_TIMEOUT=300
terraform init
Step 5: Preview the Changes with Terraform Plan
terraform planThis shows what Terraform will create without actually making any changes. Review the output to confirm it will create the S3 bucket with the expected settings.
Step 6: Apply the Configuration
terraform applyTerraform shows the plan again and asks for confirmation. Type yes and press Enter. After a few seconds, you’ll see “Apply complete! Resources: 2 added, 0 changed, 0 destroyed.”

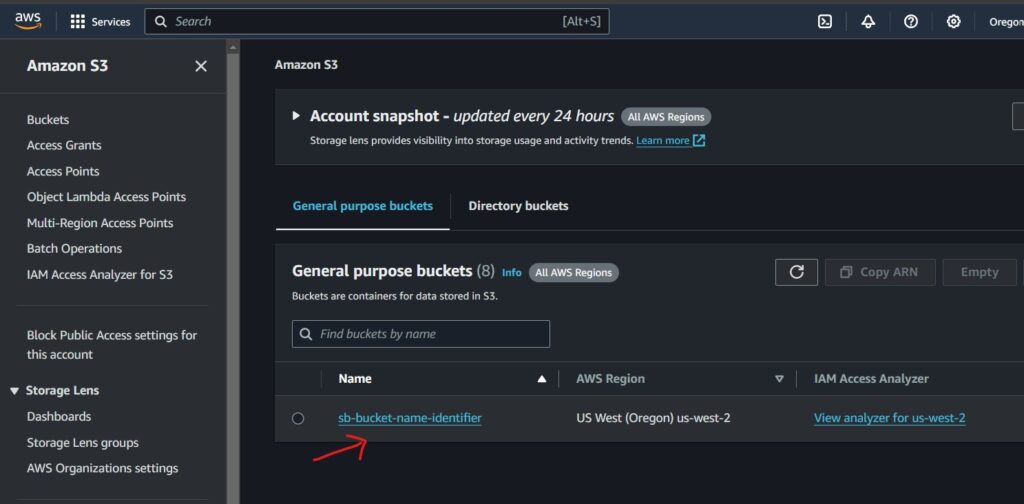
Step 7: Verify the Resource in AWS
Confirm the bucket was created using the AWS CLI:
aws s3 ls | grep terraform-demoYou can also check the AWS Console under S3 to see the bucket with the tags you defined.
Step 8: Clean Up
To avoid any charges, destroy the resources you created:
terraform destroyType yes when prompted. Terraform will delete the S3 bucket and confirm the destruction.
Conclusion
You now have Terraform configured on WSL Ubuntu and connected to AWS. From here, you can build on this setup to provision EC2 instances, VPCs, databases, and any other AWS resource Terraform supports. For designing your network infrastructure, check out How to Design IP Addressing for Amazon VPC and Subnets.