Deploying an Amazon EC2 instance is a straightforward process that can be done in just a few steps. Here’s a step-by-step guide to help you get your new Ubuntu 22.04 LTS instance up and running on AWS.
Prerequisites
Before you start, make sure you have the following:
- An active AWS account, refer to AWS official guide for creating standalone account or if you like advanced organizational account setup
- Proper IAM permissions to launch EC2 instances, refer to AWS official guide for granting permission to launch EC2
Step 1: Log In to the AWS Management Console
To begin, navigate to the AWS Management Console and log in using your AWS account credentials.
Step 2: Access the EC2 Dashboard
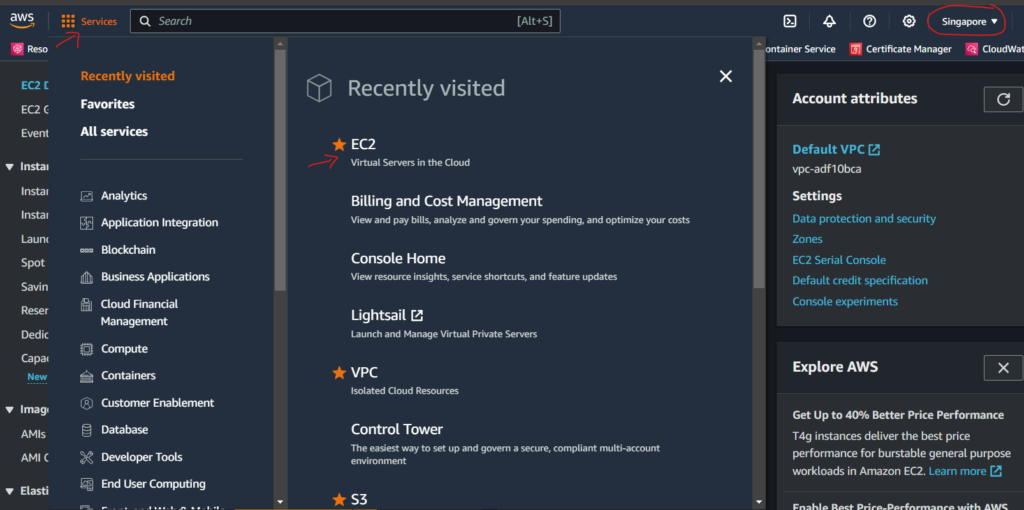
- Once logged in, find the Services menu at the top of the console.
- Click on EC2 under the Compute section to open the EC2 Dashboard.
- Don’t forget to select the specific Region that closest to your client’s user base to minimize latency.
Step 3: Launch a New Instance
On the EC2 Dashboard:
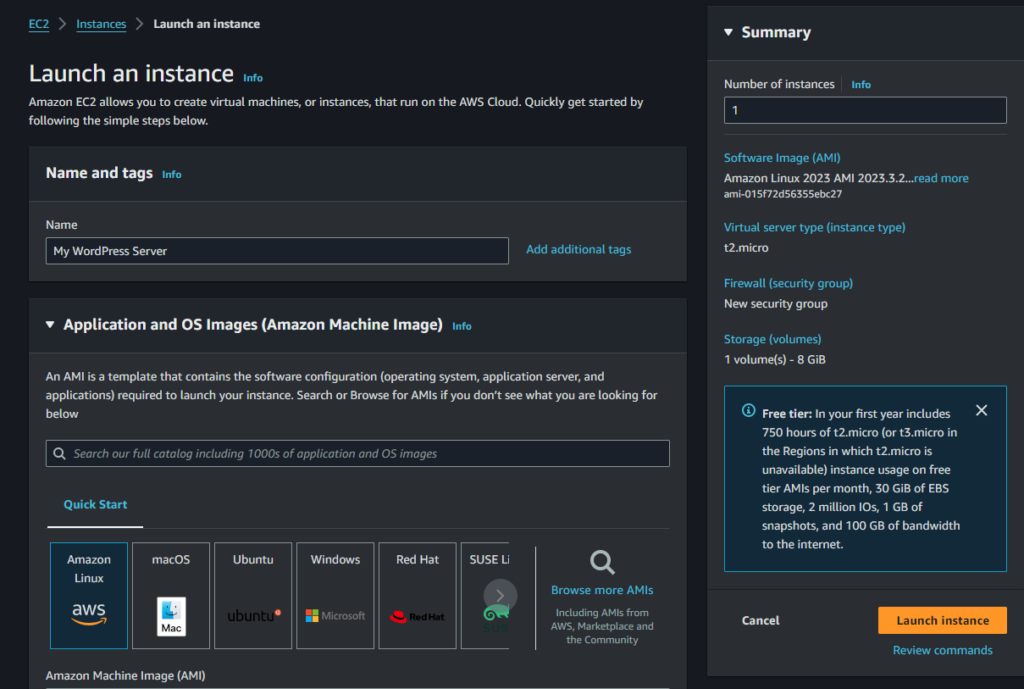
- Click on the orange Launch Instances button that will use to create new instance.
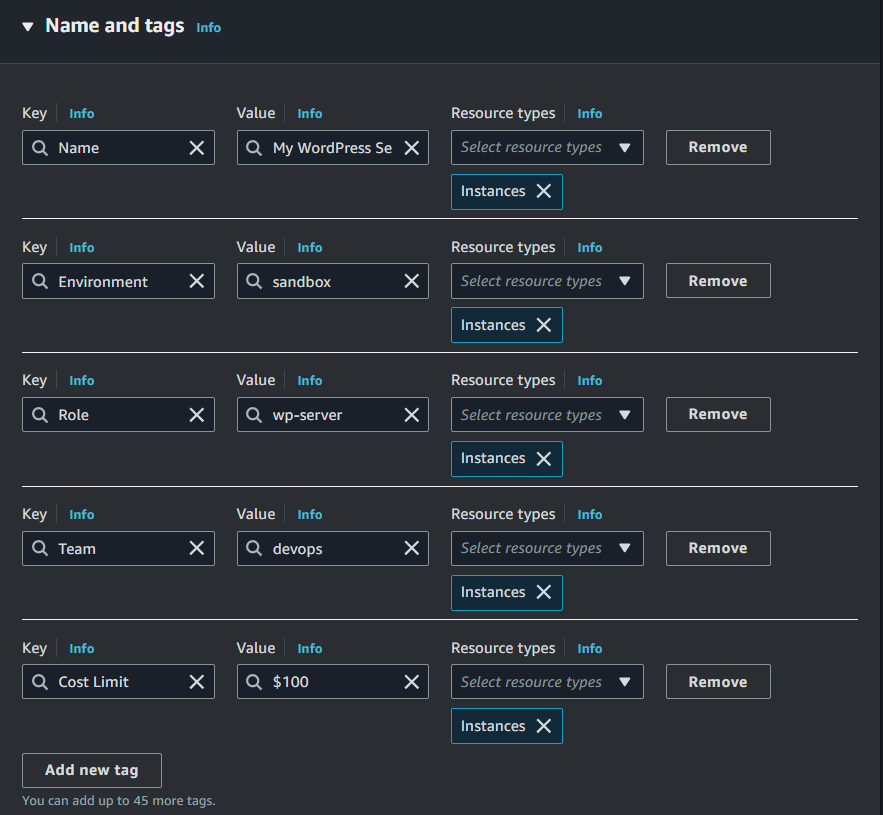
- Provide Name and tags for your EC2 instance, simply click Add additional tags and add the following sample tags in the screenshots for your EC2 instance.
Note: A tag is a label that you assign to an EC2 instance or any AWS resource. Each tag consists of a key and an optional value, both of which you define. For more details, refer to AWS official guide for tagging your AWS resources.
Step 4: Choose an Amazon Machine Image (AMI)
- You’ll see a list of AMIs to choose from.
- Search for Ubuntu in the search bar.
- Select the Ubuntu Server 22.04 LTS (HVM), SSD Volume Type AMI.

Step 5: Choose an EC2 Instance Type
- After selecting your AMI, you’ll be prompted to choose an Instance Type.
- For a typical use case, t2.micro or t3.micro instances are a cost-effective choice, eligible for the free tier if you qualify.
- Scroll down to setup keypair for EC2 instance Access.
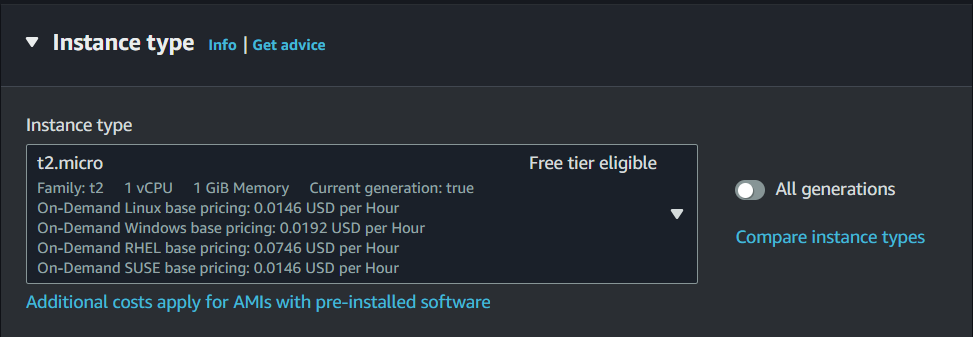
See also EC2 instance type pricing per hour for specific t2.micro instance type in us-east-1 (Virginia), refer to AWS official guide for EC2 instance type pricing.
| EC2 Instance type | Software/hr | EC2/hr | Total/hr |
| t2.micro | $0.21 | $0.012 | $0.222 |
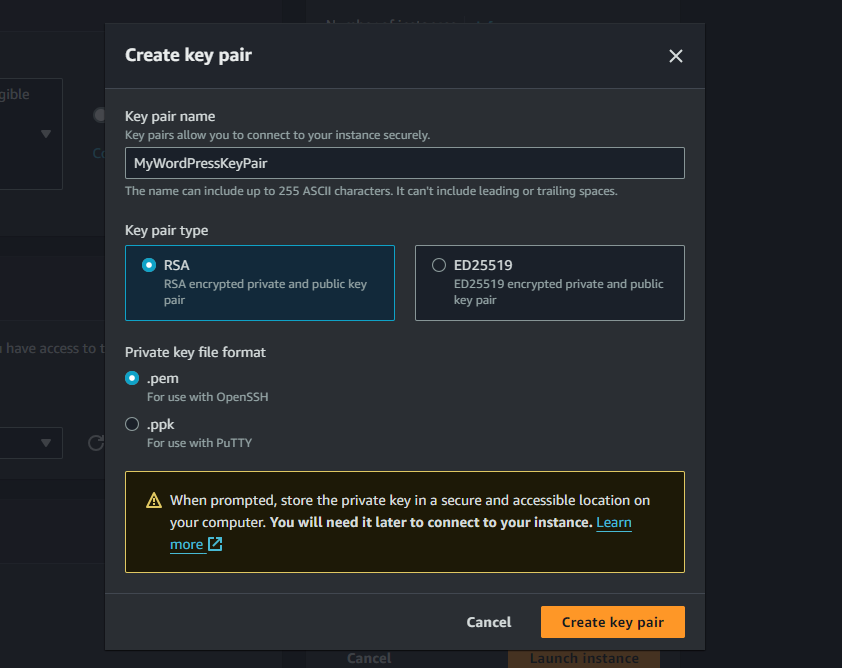
Step 6: Select a Key Pair
- Choose an existing key pair or create a new one.
- To create a new key pair:
- Select Create a new key pair from the dropdown.
- Name your key pair.
- Click Download Key Pair to save the private key file (.pem).
Select your key pair from the Key pair name required field, refer to AWS official guide about Amazon EC2 key pairs.
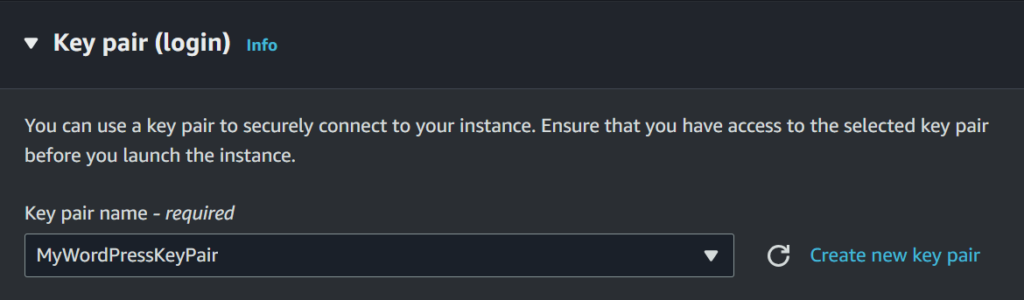
After downloading the new key pair, ensure file permissions are set correctly if you’re using a UNIX-based system:
chmod 400 /path/to/your-key-pair-name.pemStep 7: Configure Network Settings
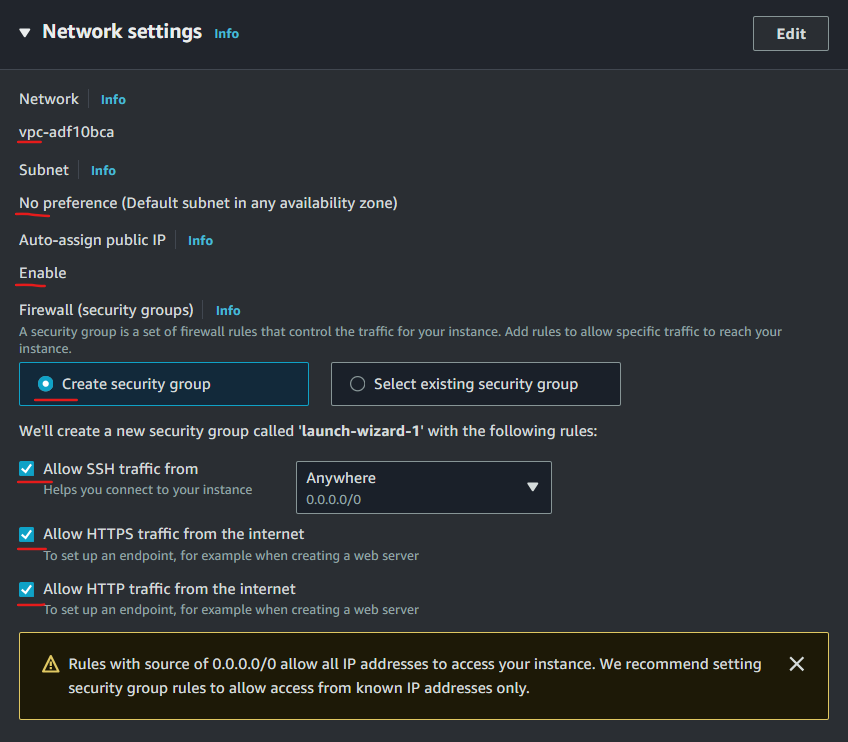
Configure your instance details according to your requirements, such as:
- The VPC and subnets are automatically set by default. If you want to change the default VPC and subnets, simply click the Edit button at the right corner.
- The instance public IP addresses are automatically assigned by default.
- To create a security group, select Create security group and enable traffic for SSH (port 22) for remote server access. Additionally, allow traffic for HTTP (port 80) and HTTPS (port 443) if necessary for web server access.
Refer to this AWS official guide if you want more details on What is Amazon VPC and How Amazon VPC works.
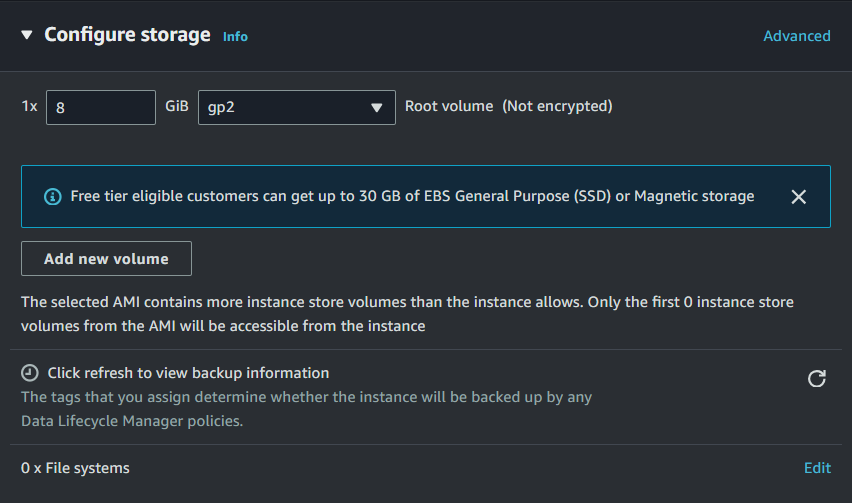
Step 8: Add Storage
- By default, an 8GB volume is provided. You can modify the size of the root volume if necessary or add additional volumes.
Volume Pricing
| Volume Type | Rate | EC2/hr |
| EBS General Purpose SSD (gp2) volumes | $0.10 per GB-month of provisioned storage | $0.012 |
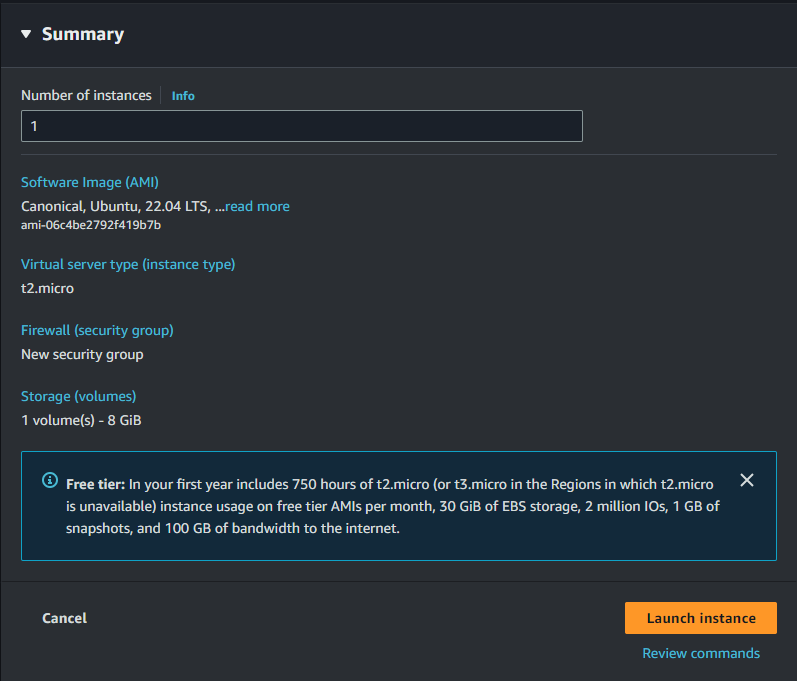
Step 9: Review and Launch
- Set number of instances to 1 by default. Adjust as needed for multiple instances.
- Go over all settings one last time.
- If everything looks correct, click Launch instance.
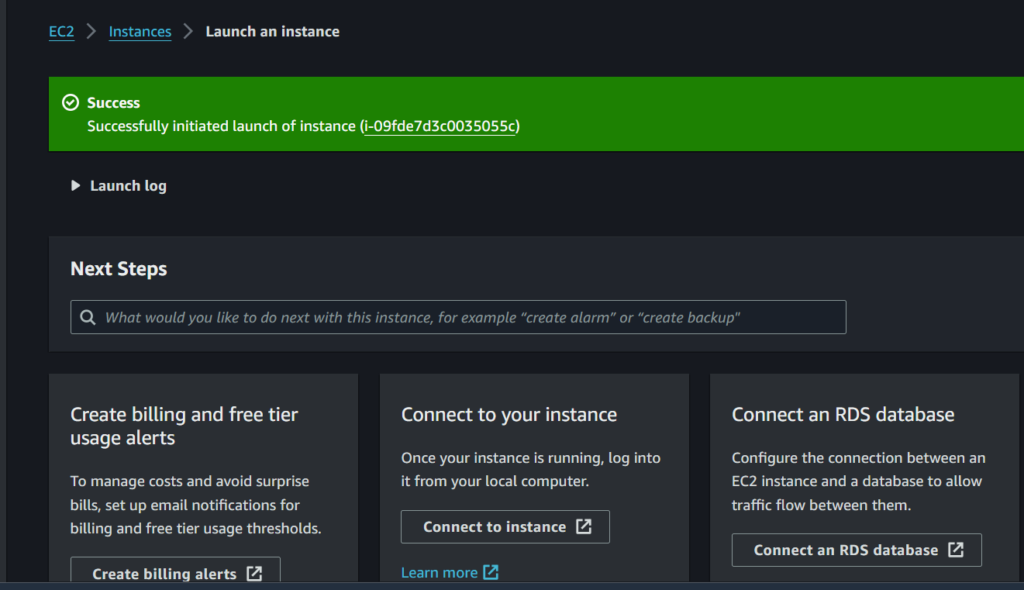
Step 10: View Your Instance and Connect
- Once successfully launched, click on the Instance ID to view instances
- You will be redirected to the Instances dashboard where you can monitor the launch status of your new instance.
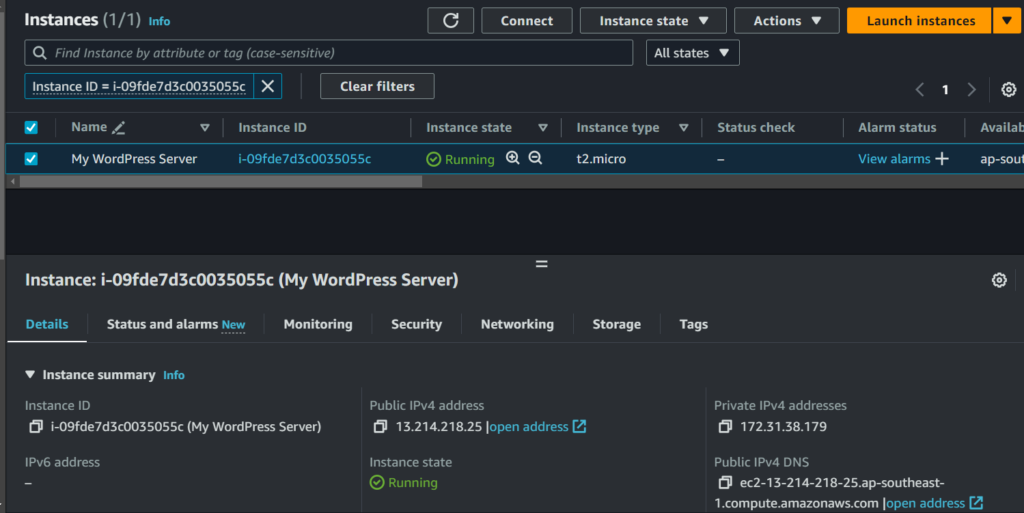
After your instance state turns to “running,” you can connect to your newly created Ubuntu server via SSH using the downloaded key pair and the public IPv4 address or Public IPv4 DNS provided by AWS.
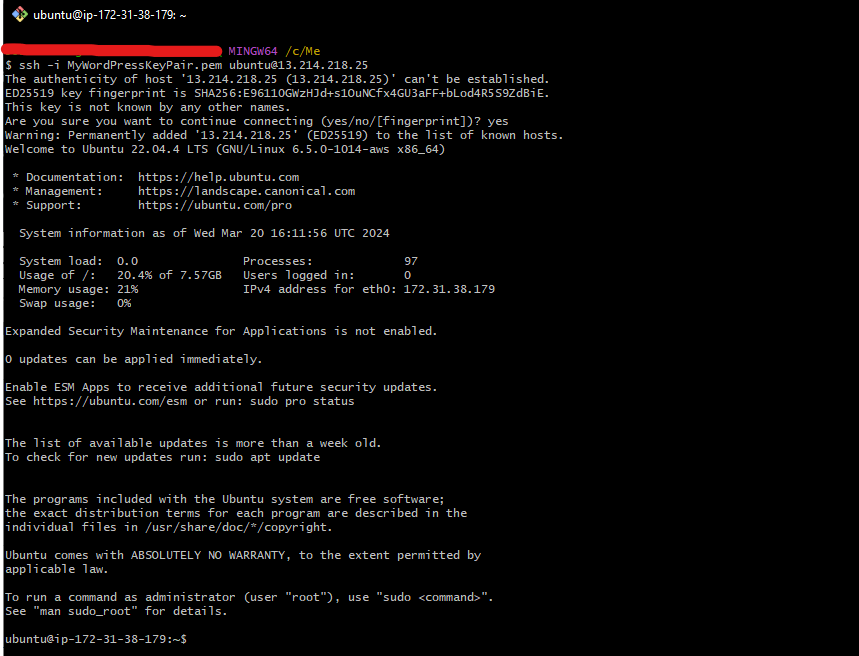
Note: You can use any Linux terminal to connect to your AWS EC2 via SSH. In this tutorial, I’m using the Git Bash terminal since it is a Linux-compatible terminal capable of executing SSH commands.
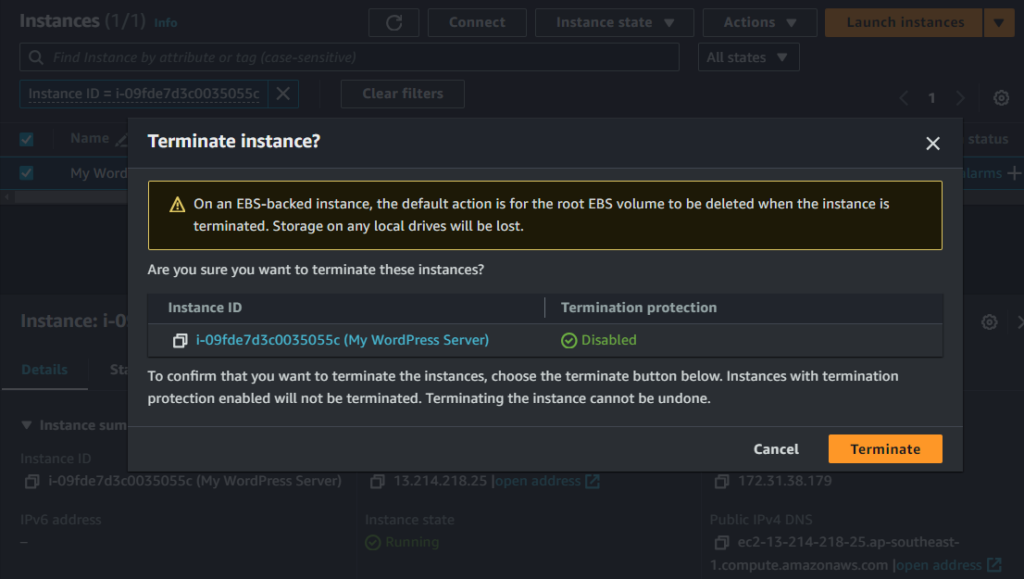
Final Step: Terminate Instance
In case you need to terminate your instance to save cost on AWS, simply click on the EC2 instance you want to delete, go to “Instance state,” and choose “Terminate instance” from the dropdown menu. This action will redirect you to the verification page.
Congratulations! You’ve successfully deployed a new EC2 Ubuntu 22.04 LTS instance on AWS. Remember to monitor and manage your instance to ensure optimal performance and security compliance.