Users of Windows Subsystem for Linux 2 (WSL 2) might sometimes find themselves unable to connect to the internet from their Ubuntu 20.04 environments. This can be frustrating, especially when trying to install packages or pull updates. In this post, we’ll explore the root cause and provide a solution to resolve this common issue.
Example of the Issue
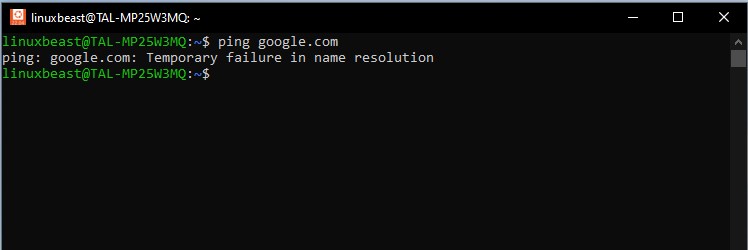
When you try to ping a website, you might see an error like this:

Understanding the Root Cause
When faced with internet connection problems in WSL 2, the typical culprit lies within the network configuration. In Ubuntu running on WSL 2, the /etc/resolv.conf file, which configures DNS nameservers, is automatically generated and managed by the system. This setup usually works well; however, it can occasionally lead to issues if there are any misconfigurations or if external factors like VPN usage alter network settings.
Some specific causes include incorrect nameserver entries in resolv.conf, WSL not properly picking up the host’s DNS settings, or network changes that occurred after WSL was started.
Step-by-Step Solution
To address these connectivity issues, follow the steps below:
Step 1. Check Your Internet Connection on Windows
Before tweaking settings on WSL 2, verify that your Windows machine has an active and working internet connection.
Step 2. Restart WSL 2
Sometimes, simply restarting WSL 2 can solve the issue since it will reinitialize the networking stack:
wsl --shutdown
After shutting down WSL 2, restart your preferred distribution as you normally would.
Step 3. Check/Update resolv.conf
Open your WSL 2 terminal and check the contents of your resolv.conf:
cat /etc/resolv.conf
If the nameserver is not correct or missing, you can manually add a known good DNS server such as Google’s 8.8.8.8.
Step 4. Modify Your resolv.conf File (Optional)
If automatic generation of resolv.conf doesn’t work as expected, consider setting the nameserver manually:
First, rename of backup the current resolv.conf:
sudo mv /etc/resolv.conf /etc/resolv.conf.bak
Next, create a new /etc/resolv.conf file with a known functioning nameserver:
nameserver 8.8.8.8
nameserver 8.8.4.4
Note: You can add more nameservers to resolve connection issues in WSL 2, such as those from your server, database, VPC, or VPN.
Step 5. Prevent WSL from Modifying resolv.conf
To stop WSL from generating a new resolv.conf every time you launch it, you can create and configure a /etc/wsl.conf file as shown below:
[boot]
systemd=true

[network]
generateResolvConf = false
Then set resolv.conf as immutable:
sudo chattr +i /etc/resolv.conf
Optional: If you need to make changes to the file later, you can remove the immutable attribute with:
sudo chattr -i /etc/resolv.conf
Step 6. WSL Successfully Connected to Internet
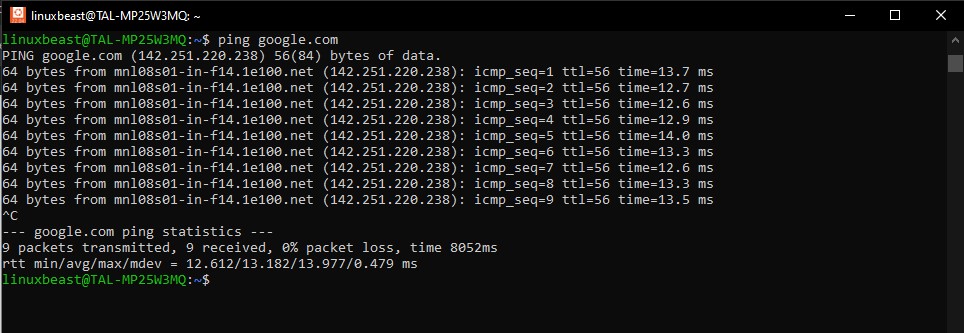
Here’s a screenshot example showing that WSL successfully connected to the internet by using the ping command on the Google domain.

Final Step. Consider Disabling and Re-enabling Network Adapters
As a last resort, if none of the above steps work, try disabling and then re-enabling your network adapters in Windows. This forces the operating system to reconfigure network settings that could potentially resolve underlying issues affecting WSL 2.
Conclusion
You can also check out this blog post on making resolve config changes permanent in WSL 2 if you come across similar issues: How to Make Resolve Config Changes Permanent in WSL 2.
Internet connectivity issues within WSL 2 can disrupt your workflow, but by following the outlined steps, you should be able to restore access and continue your development work without interruption. Always remember to check your connectivity and configurations on both Windows and WSL 2, and hopefully, you won’t have to deal with such disruptions too often.

